Let’s be real for a moment. We’ve all been there: standing in front of the mirror, wrestling with a blow dryer in one hand and a brush in the other, aiming for that sleek, salon-quality finish, only to end up with a frizzy, semi-straight poof. If you’ve ever wondered How To Straighten Hair With A Blow Dryer and actually get the smooth, glossy results you see on Instagram, you’re in the right place. The secret isn’t some magical wrist-flick—it’s a combination of the right technique, the right preparation, and, you guessed it, the right tool for the job.
Getting that perfect blowout at home can feel like a distant dream, but I promise it’s more achievable than you think. Forget everything you thought you knew about just blasting your hair with hot air until it’s dry. We’re about to dive deep into the art and science of turning your blow dryer into your most powerful straightening tool, saving your hair from unnecessary heat damage and giving you that “just left the salon” confidence, any day of the week.
Why Your Blow Dryer Is Your Secret Weapon for Straight Hair
Before we get into the nitty-gritty of technique, let’s talk about the why. A high-quality blow dryer isn’t just about drying your hair faster; it’s a sophisticated piece of technology designed to style and protect your hair simultaneously. The right dryer lays the foundation for a smooth, straight style by properly sealing the hair cuticle. A sealed cuticle means less frizz, more shine, and hair that lies flat and reflects light beautifully. An old, basic dryer? It can often just rough up that cuticle, creating the very frizz you’re trying to fight.
Decoding the Tech: Ionic, Ceramic, & Tourmaline Explained
Walking down the hair tool aisle can feel like you need a degree in engineering. Let’s break down the buzzwords into plain English so you know what you’re actually getting.
- Ionic Technology: Think of this as your frizz-fighting superhero. Ionic dryers emit negative ions that attach to the positive ions in the water droplets on your hair. This process doesn’t just break up the water for faster drying; it neutralizes static and helps seal the hair’s cuticle. The result? A smoother, shinier, and more manageable finish. I remember the first time I switched to an ionic dryer; the difference in frizz was night and day.
- Ceramic Technology: If you have fine or damaged hair, ceramic is your best friend. Ceramic components provide a consistent, even heat that’s much gentler on your strands. It radiates infrared heat, which penetrates the hair shaft from the inside out, drying it quickly without scorching the surface. It’s like the difference between cooking in a convection oven versus over an open flame—one is controlled and even, the other is harsh and unpredictable.
- Tourmaline Technology: This is like ionic technology on steroids. Tourmaline is a gemstone that’s crushed and infused into the internal components of the dryer. When heated, it produces even more negative ions than standard ionic technology, supercharging the frizz-fighting and shine-boosting effects. Dryers with both ceramic and tourmaline are often the gold standard for achieving a silky, straight look with minimal damage.
Prep is Everything: Getting Your Hair Ready for the Heat
You wouldn’t paint a wall without priming it first, right? The same principle applies here. A great blowout starts long before you even plug in your dryer.
- Wash and Condition Correctly: Use a smoothing shampoo and conditioner to start the process in the shower. Don’t skimp on conditioner, but focus it on the mid-lengths and ends to avoid weighing down your roots.
- Gently Towel Dry: Vigorously rubbing your hair with a rough cotton towel is a one-way ticket to Frizz City. Instead, gently squeeze out excess water with a soft, microfiber towel or even an old t-shirt. This minimizes friction and protects the delicate hair cuticle.
- Apply Your Arsenal: This step is non-negotiable. Always apply a high-quality heat protectant spray or cream from roots to ends. This creates a barrier between your hair and the heat, preventing moisture loss and damage. For extra smoothness, you can also layer a smoothing serum or blowout cream on top.
The Step-by-Step Guide on How to Straighten Hair with a Blow Dryer
Alright, your hair is prepped and you’re ready to go. Grab your dryer (with the concentrator nozzle attached!) and a good round brush. Let’s do this.
- Rough Dry to 80%: Before you even think about a brush, use your fingers to blow-dry your hair until it’s about 80% dry. Use a medium heat setting and keep the dryer moving constantly. Focus on lifting the roots to create some initial volume.
- Section, Section, Section: This is the most-skipped step and arguably the most important. Trying to dry your entire head of hair at once is a recipe for disaster. Divide your hair into at least four manageable sections (more if you have very thick hair) and clip them up. You’ll work on one section at a time, from the bottom up.
- Master the Round Brush Technique: This is where the magic happens. Take a 1-2 inch subsection of hair. Place your round brush at the root, underneath the section. Now, aim the concentrator nozzle of your blow dryer downwards, following the brush as you pull it slowly and tautly through your hair to the ends. The tension is key here—it’s what physically pulls the hair straight.
- Keep the Airflow Downwards: Always point the nozzle down the hair shaft, from root to tip. This ensures the cuticle lies flat, which is the secret to shine and smoothness. Aiming the dryer up or randomly from the side will just rough up the cuticle and create frizz.
- Repeat and Move Up: Continue this process, section by section, until your entire head is dry. Make sure each section is 100% dry before you move on to the next. Any lingering dampness will invite frizz to the party later on.
- Lock it in with the Cool Shot: Once a section is dry and straight, hit it with a blast of cool air using the cool shot button. This rapidly cools the hair, setting the style in place and adding a final dose of shine. It’s a game-changer for longevity.
As celebrity hairstylist Jasmine Hayes often advises her clients, “The cool shot button is the most underutilized feature on a blow dryer. Think of it like hairspray, but for the shape of your hair. A few seconds of cool air on a warm section will lock in that smoothness for hours.”
Common Mistakes to Avoid When Straightening Your Hair
Learning what not to do is just as important as learning the right steps. Steer clear of these common pitfalls:
- Using the Highest Heat Setting: Unless you have very thick, coarse hair, you don’t need to crank it up to the max. High heat can cause serious damage. Start on medium and only go higher if necessary.
- Holding the Dryer Too Close: Keep the nozzle at least a few inches away from your hair to prevent scorching your strands.
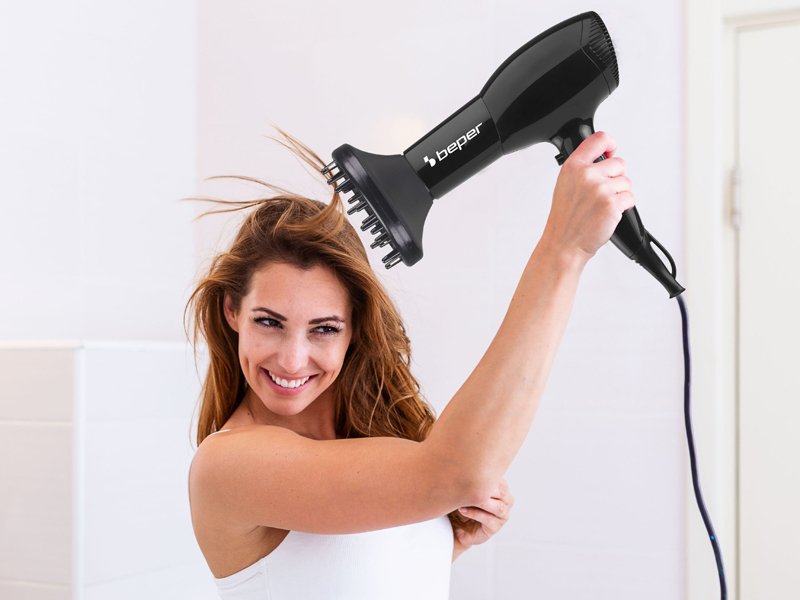
- Forgetting the Concentrator Nozzle: This little attachment is essential. It focuses the airflow into a concentrated stream, giving you the precision needed to smooth the hair cuticle. Drying without it is like trying to paint a detailed picture with a giant roller brush.
- Not Using Tension: Simply running a brush through your hair while you dry won’t do much. You need to create gentle but firm tension to pull the hair strand straight as it dries.
Which Hair Dryer Is Best for Your Hair Type?
The perfect blowout is also about a perfect match between your hair and your tool.
What’s the best dryer for fine hair?
For fine hair, the priority is to avoid heat damage and add volume. A ceramic blow dryer is ideal because it provides gentle, even heat. Look for one with multiple heat and speed settings so you can use lower temperatures, and a lighter weight to make styling easier without tiring out your arms.
And for thick or coarse hair?
For thick, coarse, or curly hair, power and technology are key. A dryer with at least 1875 watts and Tourmaline or Ionic technology will be your best bet. The high power cuts down on drying time, and the advanced technology will combat frizz and deliver a smooth, sleek finish much more effectively.
Frequently Asked Questions (FAQ)
Q1: Can I straighten my hair with a blow dryer without a round brush?
You can get your hair straighter using a paddle brush, but for that super sleek, beveled-end salon finish, a round brush is essential. It provides the tension and curve needed to smooth the hair perfectly from root to tip.
Q2: How often can I straighten my hair with a blow dryer?
With proper heat protection and a quality dryer used on a medium setting, you can safely blow-dry your hair straight every time you wash it. The key is to listen to your hair; if it starts to feel dry or brittle, give it a break with some air-drying days.
Q3: Is ionic or ceramic better for straightening hair?
They both serve a purpose. Ceramic is about gentle, even heat (great for protection), while ionic is about speed and frizz-fighting (great for smoothness). The best dryers often combine both technologies for optimal results. If you have to choose one, go with ionic for thick/frizzy hair and ceramic for fine/damaged hair.
Q4: Do I really need a heat protectant?
Yes, absolutely. It’s a non-negotiable step. A good heat protectant is the only thing standing between your beautiful hair and potential heat damage, split ends, and dryness. Don’t ever skip it.
Q5: My hair still looks a little frizzy after blow drying. What am I doing wrong?
This is usually due to one of three things: your hair wasn’t 100% dry, you didn’t use the concentrator nozzle, or you didn’t point the airflow down the hair shaft. Double-check that each section is completely dry and finish with a cool shot to seal the deal.
Your Perfect Blowout Awaits
Mastering how to straighten hair with a blow dryer is a skill that transforms your hair routine. It’s not just about drying; it’s about styling with intention. By investing in a quality tool that works with your hair and dedicating a little extra time to proper technique—from prep to the final cool shot—you unlock the power to achieve that flawless, long-lasting straight style at home. So go ahead, grab your dryer, and get ready to turn heads with your beautifully smooth, healthy-looking hair. You’ve got this.