Achieving salon-quality sleek and smooth hair at home often feels like a secret reserved for professional stylists. However, with the right tool and technique, you can unlock that polished finish yourself. The unsung hero in many hair drying routines is the concentrator nozzle – that narrow attachment often overlooked or misused. This guide will transform your hair drying experience, showing you exactly how to wield this powerful accessory to banish frizz, enhance shine, and create effortlessly sleek styles, regardless of your hair type. Get ready to elevate your hair game and enjoy hair that looks beautifully styled, every single day.
Understanding Your Hair Dryer Attachments: Concentrator vs. Diffuser
Before diving into techniques, it’s crucial to understand the distinct roles of your hair dryer’s primary attachments: the concentrator and the diffuser. While both are designed to enhance your drying experience, they serve fundamentally different purposes.
The concentrator nozzle, as its name suggests, narrows the airflow from your hair dryer into a focused stream. This precision allows you to direct heat and air exactly where you want it, making it ideal for straightening, smoothing, and precise styling. It’s your go-to for achieving sleek, polished looks, reducing frizz, and speeding up drying time on specific sections of hair. Concentrators are typically flat and have a narrow opening, available in various widths for different styling needs.
In contrast, a diffuser disperses the airflow over a larger area, reducing the intensity of the heat. This gentle, wide distribution of air is perfect for enhancing natural curls and waves, adding volume, and minimizing frizz without disturbing the hair’s natural pattern. Diffusers usually have a bowl-like shape with finger-like projections that lift and separate hair. If your goal is to define curls, a diffuser is your friend. But for sleekness, the concentrator is king.
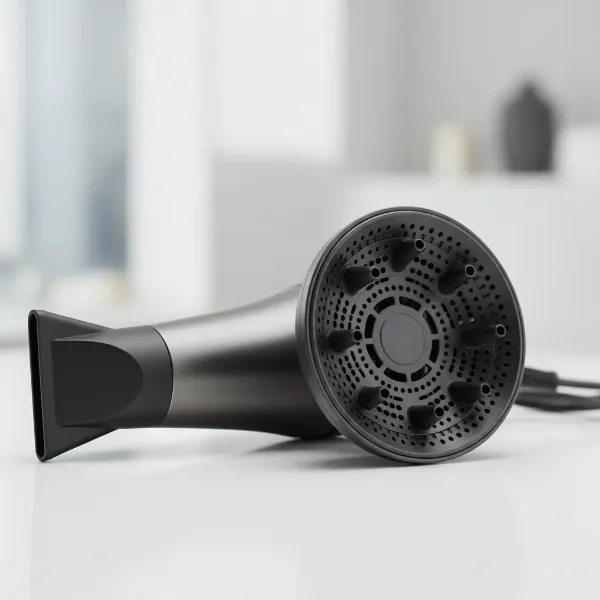 Hair dryer attachments: concentrator nozzle for sleek hair and diffuser for natural curls.
The Science Behind Sleek: How a Concentrator Nozzle Works
The magic of the concentrator nozzle lies in its ability to harness controlled airflow and heat, fundamentally changing how your hair responds to drying. When you use a standard hair dryer without an attachment, the hot air blows everywhere, often causing chaos, tangles, and frizz as hair strands are tossed around.
The concentrator, by narrowing the air stream, allows you to work section by section, much like a professional stylist. This focused airflow smooths the hair cuticle – the outermost layer of your hair shaft. When the cuticle is rough or open, hair appears dull and frizzy. By directing consistent heat and air down the hair shaft, from roots to ends, the concentrator helps to flatten and seal the cuticle. A sealed cuticle reflects light better, resulting in hair that looks shinier, feels smoother, and is less prone to frizz. This precise control also minimizes hair agitation, which is a major contributor to frizz and flyaways, giving you a remarkably sleek and polished finish.
Preparing Your Hair for a Flawless Finish
Proper preparation is the cornerstone of any successful hairstyle, especially when aiming for a sleek look with a concentrator nozzle. Skipping these vital steps can lead to a less-than-perfect outcome, even with the best technique.
Begin by gently towel-drying your hair to remove excess water. Aim for about 60-70% dry; your hair should be damp, not dripping wet. Rough towel-drying can cause friction and lead to frizz, so blot gently.
Next, apply a heat protectant spray or cream evenly throughout your hair. This is non-negotiable. Heat protectants form a barrier around your hair strands, shielding them from the potential damage of high heat and helping to maintain moisture. Look for products that also offer frizz control or shine-enhancing benefits for an added boost.
Depending on your hair type and desired outcome, you might also consider a smoothing serum or a lightweight styling cream. For very fine hair, a volumizing mousse at the roots can add lift without compromising sleekness. For thicker, coarser hair, a leave-in conditioner or a heavier smoothing balm can provide extra control and hydration. Distribute these products evenly, focusing on the mid-lengths and ends where hair tends to be driest or most prone to frizz. Ensure your hair is thoroughly detangled using a wide-tooth comb or a detangling brush before you begin drying.
Step-by-Step Guide: Using a Concentrator Nozzle for Sleek Hair
Mastering the concentrator nozzle requires a systematic approach. Follow these steps to achieve a smooth, sleek finish.
- Attach the Concentrator: Securely attach the concentrator nozzle to your hairdryer. Ensure it’s firmly in place before turning on the dryer.
- Section Your Hair: Divide your damp, product-prepped hair into manageable sections. Smaller sections (about 1-2 inches wide) are easier to work with and ensure even drying and smoothing. Use hair clips to keep the unworked sections out of the way.
- Start at the Roots: Begin drying from the roots of the first section. Place your brush (a paddle brush or a round brush works best for sleekness) underneath the hair section, close to the scalp.
- Angle the Nozzle Downwards: This is crucial. Always point the concentrator nozzle downwards, parallel to your hair shaft, and follow the brush as you glide it slowly from roots to ends. The downward angle helps to seal the hair cuticle, minimizing frizz and maximizing shine.
- Maintain Tension: As you pull the brush through the section, maintain gentle tension. This tension helps to smooth the hair fibers and create a straight, sleek path for the airflow.
- Move Steadily: Move the dryer and brush together at a steady, consistent pace. Avoid holding the dryer in one spot for too long, as this can cause heat damage.
- Repeat for Each Section: Continue this process, working through each section of your hair until it is completely dry and smooth. Pay extra attention to the areas prone to frizz, like the hairline.
- Cool Shot Finish: Once all sections are dry, use the cool shot button on your dryer. This blast of cool air helps to set the style and further seal the cuticle, locking in shine and smoothness.
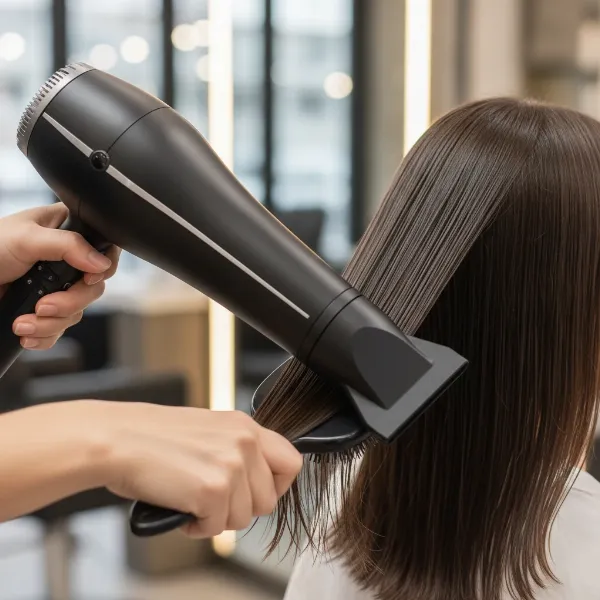 Person styling hair with a concentrator nozzle, pointing it downwards for sleekness.
Advanced Techniques for Different Hair Types
While the basic technique remains consistent, adapting your approach can yield even better results based on your hair type.
-
For Fine Hair: Use a lower heat setting and a medium airflow. Too much heat or power can over-dry and damage fine hair. Focus on creating volume at the roots by slightly lifting sections with your brush while directing the nozzle downwards. A narrow concentrator nozzle can offer precise control without overwhelming the delicate strands. Finish with a lightweight smoothing serum.
-
For Thick Hair: You’ll likely need a higher heat setting and strong airflow to dry efficiently. Ensure you take very small sections to ensure even drying throughout. Consider using a wide concentrator nozzle to cover more area without sacrificing control. Investing in a powerful dryer with good wattage will also significantly cut down drying time.
-
For Curly or Wavy Hair (to Straighten): If your goal is to straighten naturally curly or wavy hair, pre-dry your hair about 50% with a regular nozzle, rough-drying gently. Then, switch to the concentrator. Use a heat protectant specifically designed for straightening. You might find a flat paddle brush more effective for pulling the hair taut and straight, working in small sections. Multiple passes might be needed for very coily hair, but always keep the dryer moving.
Common Mistakes to Avoid When Using a Concentrator Nozzle
Even with the best intentions, certain habits can sabotage your sleek hair goals. Be mindful of these common pitfalls:
- Incorrect Nozzle Angle: The most frequent mistake is pointing the nozzle upwards or perpendicular to the hair. This lifts the cuticle, leading to frizz instead of smoothing. Always direct the airflow downwards along the hair shaft.
- Drying Hair That’s Too Wet: Attempting to style hair that’s still dripping wet will take forever and often results in over-drying or heat damage from prolonged exposure. Get your hair about 60-70% dry first.
- Holding the Dryer Too Close or Too Still: Keeping the concentrator too close to your hair or holding it in one spot can cause direct heat damage, burning your hair or scalp. Keep the dryer moving consistently.
- Forgetting Heat Protectant: Neglecting heat protectant is a direct invitation for damage. It’s an essential step for shielding your hair from high temperatures.
- Using Too High Heat: While heat helps to style, excessive heat can fry your hair, especially if it’s fine or color-treated. Start with a medium heat setting and increase only if necessary.
- Not Sectioning Hair: Trying to dry your entire head at once leads to uneven drying, missed spots, and a messy finish. Proper sectioning ensures every strand gets attention.
- Skipping the Cool Shot: The cool shot is not just a fancy button; it’s vital for setting your style and enhancing shine by closing the hair cuticle.
Styling Tips and Product Pairings for Extra Sleekness
To truly maximize the sleek potential of your concentrator nozzle, integrate these styling tips and product recommendations into your routine.
- Pre-Styling Serums: Before drying, use a lightweight, anti-frizz serum or a smoothing lotion. These products create a barrier against humidity and provide an extra layer of sleekness. Look for ingredients like argan oil, silicone, or keratin.
- Brushes Make a Difference:
- Paddle Brush: Excellent for creating smooth, straight looks, especially on long or thick hair. Its wide, flat surface helps to detangle and smooth large sections efficiently.
- Round Brush: Perfect for adding slight bends, volume at the roots, or a polished curl at the ends while still achieving overall sleekness. Choose a barrel size appropriate for your hair length.
- Strategic Pinning: For stubborn sections or to achieve extra volume at the crown while drying, pin up sections of hair after they are dry and cool. This helps to lock the style in place.
- Finishing Sprays: Once your hair is completely dry and cool, a light mist of flexible hold hairspray can help combat flyaways and keep your sleek style intact throughout the day without making it stiff.
- Shine Sprays: For an ultimate glossy finish, a shine spray or a very small amount of finishing oil applied to the mid-lengths and ends will add incredible luster.
- Avoid Over-Brushing Dry Hair: Once your hair is dry and styled, avoid excessive brushing, as this can reintroduce static and frizz. Use your fingers to gently smooth any flyaways or a soft-bristle brush if necessary.
The Concentrator Nozzle: A Game-Changer for All Hair Types
The concentrator nozzle is more than just an accessory; it’s a fundamental tool for anyone seeking to achieve a professional, sleek finish at home. By focusing airflow, it tames frizz, enhances shine, and provides precise control, transforming your hair from unruly to polished. While often underestimated, its proper use can drastically improve your hair’s appearance and health, protecting it from haphazard heat exposure. Embrace the concentrator, practice these techniques, and discover the effortlessly sleek, smooth hair you’ve always desired.
Frequently Asked Questions
What is the main benefit of using a concentrator nozzle?
|
Our Picks for the Best Hair Dryer in 2026
As an Amazon Associate I earn from qualifying purchases.
|
||
| Num | Product | Action |
|---|---|---|
| 1 | INFINITI PRO by CONAIR Hair Dryer, 1875W Blow Dryer with Diffuser and Concentrator, Ceramic Technology, 3 Heat & 2 Speed Settings, Cold Shot Button, Black |

|
| 2 | Conair Double Ceramic Hair Dryer, 1875W Blow Dryer with Diffuser and Concentrator, Ionic Conditioning, 3 Heat & 2 Speed Settings, Amazon Exclusive, White |
|
| 3 | INFINITI PRO by CONAIR Hair Dryer, 1875W Blow Dryer with Diffuser and Concentrator Attachments, AC Motor with Ceramic Technology, 3 Heat & 2 Speed Settings, Plum |
|
| 4 | Wicked Glinda Hair Dryer with Diffuser from Conair - INFINITIPRO by CONAIR Hair Dryer with Ceramic Technology - Includes Diffuser and Concentrator |
|
| 5 | Wavytalk Hair Dryer, Blown Away Ionic Hair Dryer for Curly Hair with Diffuser, 1875W Fast Drying Blow Dryer with Ceramic Technology, 3 Attachments for All Hair Types, Light and Quiet, Rose Gold |
|
| 6 | Wicked Elphaba Hair Dryer with Diffuser from Conair - INFINITIPRO by CONAIR Hair Dryer with Ceramic Technology - Includes Diffuser and Concentrator |
|
| 7 | Infiniti PRO CONAIR Hair Dryer with Diffuser and Concentrator, 1875W Style & Shine Blow Dryer with Tourmaline and Ionic Conditioning to Fight Frizz, 3 Heat & 2 Speed Settings, Blue |
|
| 8 | Wavytalk Hair Dryer with Diffuser, Blown Away Ionic Hair Dryer for Curly Hair with Comb, 1875W Fast Drying Blow Dryer with Ceramic Technology, 3 Attachments for All Hair Types, Light and Quiet, Black |
|
| 9 | Conair Double Ceramic Hair Dryer - Blow Dryer with Ionic Conditioning - Includes Concentrator |
|
| 10 | Infiniti PRO CONAIR Hair Dryer with Diffuser, Professional AC Motor, Tourmaline Ceramic Technology Blow Dryer, Includes Concentrator and Blowout Brush, Amazon Exclusive, Gray |
|
The main benefit is precision drying and styling. It focuses airflow to smooth the hair cuticle, reduce frizz, and create a sleek, shiny finish, allowing you to style specific sections of hair effectively.
Can I use a concentrator nozzle on curly hair?
Yes, you can use a concentrator nozzle on curly hair if your goal is to straighten it and achieve a sleek look. It helps to smooth out curls and waves by directing heat down the hair shaft as you brush. For defining curls, however, a diffuser is more appropriate.
What temperature setting should I use with a concentrator nozzle?
Generally, a medium heat setting is recommended to minimize heat damage while still being effective. For very fine or damaged hair, use a lower setting. For thick or coarse hair, a higher setting may be necessary but always keep the dryer moving.
How do I prevent frizz when using a concentrator nozzle?
To prevent frizz, always point the concentrator nozzle downwards, following your brush from roots to ends. Ensure your hair is properly prepped with heat protectant and smoothing products, and work in small, manageable sections.
Is a wide or narrow concentrator nozzle better?
A narrow concentrator nozzle provides more intense, precise airflow, ideal for small sections and very sleek results. A wider concentrator nozzle covers more surface area, which can speed up drying time for thicker hair while still offering control. The best choice depends on your hair type and desired styling.