Few things are as frustrating as reaching for your hair dryer, only to find its cord a snarled mess of twists and kinks. Not only does a tangled cord make styling your hair more difficult, but it can also pose significant safety risks and shorten the lifespan of your beloved appliance. As someone who has spent over a decade deep in the world of hair dryers, I understand these everyday struggles.
This guide will walk you through effective, real-world methods to untangle your twisted hair dryer cord, ensuring both its longevity and your safety. We’ll explore various techniques, from simple manual fixes to gentle heat applications, and most importantly, equip you with preventative strategies to keep your cord knot-free in the future. Let’s get your hair dryer cord straightened out so you can focus on achieving perfect hair days, every day.
Understanding Twisted Cords: Why They Happen & The Risks
Twisted hair dryer cords are an incredibly common issue, often stemming from the way we use and store our appliances. One primary culprit is the natural rotation of the hand during drying, which subtly twists the cord over time. Improper wrapping techniques, such as tightly winding the cord around the dryer body, can also contribute significantly to kinking and tangling. Each time the cord is twisted in one direction without being untwisted, the internal wires and external insulation accumulate stress, leading to a “memory” for the twisted shape.
Beyond mere annoyance, a severely twisted or kinked hair dryer cord can present serious hazards. Continuous twisting can lead to metal fatigue in the internal copper wires, potentially causing them to break or fray. This damage might not be visible on the surface, but it can create weak points that increase electrical resistance, generate heat, and could even lead to internal arcing, posing a fire risk. Such damage not only compromises the appliance’s functionality but, more critically, can lead to electrical shocks or overheating, reducing the overall safety and lifespan of your hair dryer.
Essential Tools for Detangling Your Hair Dryer Cord
Successfully untangling a twisted hair dryer cord often requires nothing more than your hands and a bit of patience. However, for more stubborn knots, a few additional items can be incredibly helpful:
- Your Hands: The primary tools for gently manipulating and untwisting the cord.
- A Blunt Pin or Pencil: For extremely tight knots that are difficult to loosen with fingers. It helps create leverage without damaging the cord. Ensure the pin is not sharp to avoid accidental piercing of the cable.
- Your Hair Dryer (on low heat): Ironically, your hair dryer can be used to warm and relax its own cord, making it more pliable.
- A Bowl of Warm Water: Another method for gently heating the cord to relax the plastic, though caution is paramount to keep electrical components dry.
These tools, combined with the right technique, will help you restore your cord to its original, untangled state.
Step-by-Step Guide to Untangling a Hair Dryer Cord
Before you begin, always ensure your hair dryer is unplugged from the power outlet. Safety is paramount when dealing with electrical cords.
Initial Assessment: Unplug and Inspect
|
Our Picks for the Best Hair Dryer in 2026
As an Amazon Associate I earn from qualifying purchases.
|
||
| Num | Product | Action |
|---|---|---|
| 1 | Wicked Elphaba Hair Dryer with Diffuser from Conair - INFINITIPRO by CONAIR Hair Dryer with Ceramic Technology - Includes Diffuser and Concentrator |

|
| 2 | Infiniti PRO CONAIR Hair Dryer with Diffuser and Concentrator, 1875W Style & Shine Blow Dryer with Tourmaline and Ionic Conditioning to Fight Frizz, 3 Heat & 2 Speed Settings, Blue |
|
| 3 | Wavytalk Hair Dryer, Blown Away Ionic Hair Dryer for Curly Hair with Diffuser, 1875W Fast Drying Blow Dryer with Ceramic Technology, 3 Attachments for All Hair Types, Light and Quiet, Rose Gold |
|
| 4 | Conair Double Ceramic Hair Dryer, 1875W Blow Dryer with Diffuser and Concentrator, Ionic Conditioning, 3 Heat & 2 Speed Settings, Amazon Exclusive, White |
|
| 5 | Infiniti PRO CONAIR Hair Dryer with Diffuser, Professional AC Motor, Tourmaline Ceramic Technology Blow Dryer, Includes Concentrator and Blowout Brush, Amazon Exclusive, Gray |
|
| 6 | Wicked Glinda Hair Dryer with Diffuser from Conair - INFINITIPRO by CONAIR Hair Dryer with Ceramic Technology - Includes Diffuser and Concentrator |
|
| 7 | INFINITI PRO by CONAIR Hair Dryer, 1875W Blow Dryer with Diffuser and Concentrator Attachments, AC Motor with Ceramic Technology, 3 Heat & 2 Speed Settings, Plum |
|
| 8 | INFINITI PRO by CONAIR Hair Dryer, 1875W Blow Dryer with Diffuser and Concentrator, Ceramic Technology, 3 Heat & 2 Speed Settings, Cold Shot Button, Black |
|
| 9 | Wavytalk Hair Dryer with Diffuser, Blown Away Ionic Hair Dryer for Curly Hair with Comb, 1875W Fast Drying Blow Dryer with Ceramic Technology, 3 Attachments for All Hair Types, Light and Quiet, Black |
|
| 10 | Conair Double Ceramic Hair Dryer - Blow Dryer with Ionic Conditioning - Includes Concentrator |
|
Start by unplugging your hair dryer. Lay the cord out as straight as possible on a flat surface or hold the dryer aloft, allowing the cord to hang freely. This initial visual inspection helps you understand the overall pattern of the twists and identify any particularly tight knots or areas of damage. Look for any visible fraying, exposed wires, or severe kinks that might indicate internal damage.
The “Lift and Shake” Method
A simple yet often effective first step is the “lift and shake” method. Hold your hair dryer by the handle, allowing the entire cord to dangle freely towards the floor. Gently shake the hair dryer. The weight of the dryer and the force of gravity can sometimes encourage minor twists and kinks to naturally unwind themselves. Don’t start trying to untwist individual knots immediately, as this can sometimes create new, tighter ones.
Manual Detangling: Loosening and Guiding the Plug
Once you’ve done the initial shake, begin working on the cord from the plug end. Identify the first significant loop or knot. Gently work it open with your fingers. The goal is not to completely unwind each knot at this stage, but rather to create enough slack to guide the power plug through the loops. If you encounter a knot that is too tight to loosen by hand, carefully insert a blunt pin or pencil into the center of the knot. Wiggle it gently to create a small opening, then slowly pull the cable or move the pin to loosen the knot. Continue this process, systematically guiding the plug through each loop in sequence until the entire cord is straightened.
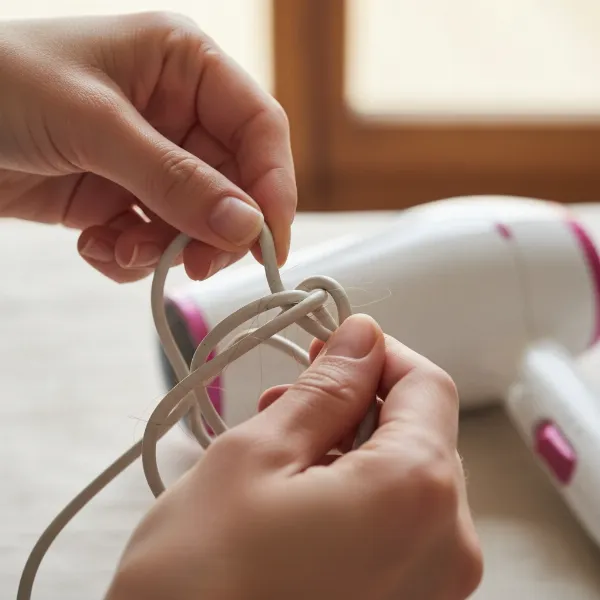 A person's hands carefully untangling a twisted hair dryer cord on a light background.
Using Gentle Heat: Hair Dryer or Warm Water Method
For stubborn kinks that retain their shape even after manual untangling, applying gentle heat can help relax the plastic insulation.
Hair Dryer Method:
Use your own hair dryer (if it’s not the one you’re fixing, or if it’s functional and the cord isn’t severely damaged) on a low heat and low speed setting. Hold the hair dryer about 6-8 inches away from the twisted sections of the cord and keep it moving constantly. Do not focus the heat on one spot for too long, as this can melt the insulation. As the cord warms, it will become more pliable, allowing you to gently straighten out the kinks with your hands. Some users find it helpful to tape the cord flat to a surface with painter’s tape while applying heat to help it retain a straight shape as it cools.
Warm Water Method (Use with Extreme Caution):
This method should only be used if the cord’s insulation is completely intact and there are no exposed wires. Fill a bowl with warm (not boiling) water. Carefully submerge the twisted sections of the cord into the water for about 30 seconds, ensuring that both the plug and the dryer unit remain completely out of the water. The heat from the water will relax the plastic. After 30 seconds, remove the cord and gently pull it straight. Allow the cord to cool and dry completely before plugging it back in. Never submerge the plug or the hair dryer itself in water.
Preventative Measures: Keeping Your Cord Tangle-Free
The best way to deal with a twisted cord is to prevent it from happening in the first place. Adopting good habits can significantly extend the life of your hair dryer and ensure hassle-free styling.
Proper Wrapping Techniques
One of the most common causes of twisted cords is improper wrapping. Avoid tightly coiling the cord around the hair dryer immediately after use. Instead, try these methods:
- Loose Coil: Hold the hair dryer in one hand and gently coil the cord into a loose, large loop, letting it fall naturally without forcing it into tight bends. This reduces stress on the internal wires.
- Figure-Eight Wrap: If your cord is long, try wrapping it in a figure-eight pattern. This technique, often used by professionals for audio and video cables, prevents kinks and maintains the cord’s natural lay.
Avoiding Cord Twists During Use
Pay attention to how you hold and maneuver your hair dryer. Many people unconsciously twist the dryer during styling, which translates directly to twists in the cord. Try to keep your hand position stable relative to the cord’s entry point into the dryer. Periodically, during longer drying sessions, let the dryer hang freely to allow any accumulated twists to unwind.
Storage Solutions
Effective storage is key to preventing future tangles.
- Hooks: Install a hook on the back of a cabinet door or wall where you can hang your hair dryer, allowing the cord to drape loosely without kinks.
- Cord Organizers/Wraps: Consider using Velcro straps or dedicated cord organizers to secure your loosely coiled cord. This keeps it tidy without creating tight bends.
- Drawer Dividers: If storing in a drawer, use a divider to keep the hair dryer and its cord separate from other items that could cause tangles.
By implementing these simple practices, you’ll find your hair dryer cord remains much straighter and easier to manage.
When to Consider Replacement: Safety First
While many twisted cords can be salvaged, there comes a point where damage is too severe, making replacement the safest and most prudent option. It’s crucial to prioritize safety over attempting to repair a potentially dangerous appliance.
Signs of Damage
Always inspect your hair dryer cord for these warning signs:
- Visible Fraying or Exposed Wires: Any breach in the outer insulation can expose live electrical wires, leading to a shock hazard.
- Cracked or Brittle Insulation: This indicates the cord material is deteriorating, increasing the risk of exposed wires and short circuits.
- Kinks that Don’t Straighten: If despite your best efforts, sections of the cord remain stubbornly kinked, it suggests internal wire damage.
- Overheating: If the cord or plug feels unusually warm to the touch during or after use, it could be a sign of increased electrical resistance due to internal damage.
- Intermittent Power: If your dryer sporadically loses power, it could be due to a damaged internal connection within the cord.
The Dangers of a Damaged Cord
A compromised cord is a serious electrical hazard. It can cause short circuits, leading to tripped breakers, or worse, electrical fires. The risk of electric shock is also significantly higher with damaged insulation. Attempting to repair a damaged cord with electrical tape is a temporary and often insufficient fix that does not address internal wire issues.
Expert Recommendation for Replacement
As a hair dryer technician with extensive experience, I strongly advise that if you observe any of the above signs of damage, it is safest to replace the entire hair dryer. While it might seem costly, the potential risks of using a damaged appliance far outweigh the price of a new one. A hair dryer’s cord is an integrated and critical safety component; if it’s compromised, the entire unit’s safety is at stake.
“A seemingly minor cord twist can mask significant internal wire damage, turning a convenience into a potential hazard. When in doubt, always err on the side of caution and consider replacing your appliance.” – [Your Name/Role], Senior Hair Dryer Technician at hairdryerbest.com
Conclusion
A twisted hair dryer cord is more than just an inconvenience; it’s a clear signal that attention is needed to ensure both effective styling and, more importantly, your safety. By understanding the causes, applying the right detangling techniques, and adopting diligent preventative measures, you can significantly prolong the life of your hair dryer and maintain its optimal performance. Remember to always unplug your appliance before handling the cord and be gentle in your approach.
However, recognizing when a cord is beyond repair is crucial. Visible damage like fraying or exposed wires is a non-negotiable sign for replacement, as attempting to salvage a compromised cord poses serious electrical risks. Regular inspection and proper care are small habits that lead to big rewards in appliance longevity and personal safety. Take a moment to check your hair dryer cord today – is it tangle-free and ready for your next perfect hair day?
Frequently Asked Questions
Is it safe to use a hair dryer with a twisted cord?
It is generally not safe to use a hair dryer with a severely twisted or kinked cord, especially if there are visible signs of damage like fraying, exposed wires, or if the cord feels hot during use. Twisted cords can cause internal wire damage, increasing the risk of electrical shock or fire. It’s best to untangle it or replace the dryer if damage is present.
How do I prevent my hair dryer cord from twisting?
Prevent twisting by using proper storage techniques such as loosely coiling the cord or using a figure-eight wrap. Avoid tightly winding the cord around the dryer. Also, be mindful of how you handle the dryer during use to prevent constant rotation that contributes to cord twists.
Can a twisted cord cause a fire?
Yes, a severely twisted or damaged cord can potentially cause a fire. The internal wires can fray or break, leading to increased electrical resistance, which generates heat. This heat can melt the insulation and ignite nearby flammable materials, posing a significant fire risk.
How often should I replace my hair dryer?
The lifespan of a Hair Dryer varies, but if the cord shows consistent signs of damage, like fraying, exposed wires, or persistent kinks that won’t straighten, it’s a strong indicator that the entire dryer should be replaced for safety reasons, regardless of its age. Regular inspection is key.