Achieving bouncy, voluminous hair with beautifully lifted roots can transform your look, especially if you have wavy, curly, or fine hair prone to flatness. While a diffuser attachment is a game-changer for enhancing curl definition and reducing frizz, mastering its use for root lift is a specific skill. This comprehensive guide will walk you through everything you need to know, from choosing the right tools to perfecting your technique, ensuring your roots get the gorgeous boost they deserve. Say goodbye to flat, lifeless roots and hello to a full, vibrant mane!
Understanding Diffusers and Why Root Lift Matters
A diffuser is an attachment that spreads the airflow from your hairdryer, dispersing it over a larger area to dry hair more gently and evenly, preventing frizz and protecting your natural curl pattern. Unlike direct heat that can disrupt curls and cause damage, a diffuser mimics air-drying while speeding up the process. For many with textured hair, the biggest challenge isn’t the mid-lengths or ends, but rather the roots, which often fall flat and lack volume, leading to a “pyramid” shape where the top is flat and the bottom is wide.
Root lift is crucial for creating a balanced, voluminous hairstyle. When your roots are lifted, your hair appears fuller and bouncier from the scalp down, enhancing your natural texture and giving your entire look a more vibrant, dynamic quality. It prevents the hair from clinging to the scalp, allowing for better air circulation and a more defined overall shape.
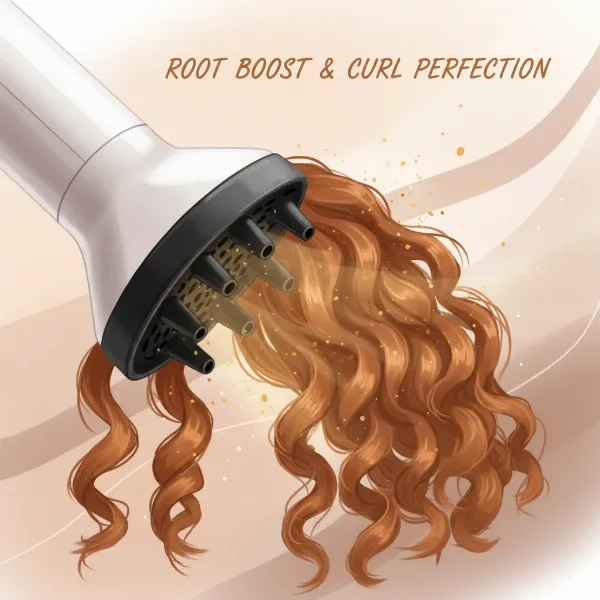 Illustrative image of a hair dryer with a diffuser attachment aiming at hair roots for lift, showing volumized hair.
Choosing the Right Diffuser and Products for Volume
The journey to exceptional root lift begins with the right tools and products. Not all diffusers are created equal, and selecting one that suits your hair type and dryer is key.
Types of Diffusers:
- Universal Diffusers: These come with adjustable bands or clamps to fit a variety of hairdryer nozzles. They are a versatile option if you switch hairdryers or want a cost-effective choice.
- Brand-Specific Diffusers: Many hairdryer brands, like Dyson or DevaCurl, offer diffusers designed to perfectly fit their own models. These often provide optimized airflow and superior performance.
- Bowl-Shaped Diffusers: The most common type, these have a deep bowl and various prongs. They are excellent for cupping large sections of hair and are great for achieving volume.
- Hand-Shaped Diffusers: Less common, these have finger-like projections designed to lift and separate curls as you dry.
Features to Look For:
- Prong Length: Longer prongs can reach deeper into your roots, helping to lift them more effectively. Shorter prongs are good for more delicate waves.
- Bowl Depth and Size: A deeper, wider bowl allows you to cup larger sections of hair without disturbing the curl pattern, which is ideal for maximum root lift.
- Material: Some diffusers are made with ceramic or tourmaline elements to provide more even heat distribution and reduce static, contributing to healthier-looking volume.
Essential Products for Root Lift:
Pairing your diffuser with the right styling products is vital. These products work synergistically to provide hold, volume, and protection.
- Root Lifting Sprays/Mousses: Applied directly to the roots, these products contain ingredients that coat the hair shaft, providing structure and memory for lift.
- Volumizing Foams: Lightweight and airy, foams can be distributed throughout the hair, offering overall volume and light hold without weighing curls down.
- Heat Protectants: Always use a heat protectant to shield your hair from thermal damage, even with the gentle heat of a diffuser. Some heat protectants also offer volumizing benefits.
How to Apply Products for Maximum Root Lift:
After washing and conditioning, gently squeeze out excess water. While your hair is still damp, not soaking wet, apply your root lifter directly to the scalp and roots, massaging it in lightly. Follow with a volumizing foam or light gel, scrunching it through your mid-lengths and ends. Ensure even distribution, as this is critical for consistent volume and hold.
Preparing Your Hair for Optimal Root Lift
Proper hair preparation is often overlooked but is fundamental to achieving lasting root lift. Starting with well-prepared hair ensures your efforts with the diffuser yield the best results.
Washing and Conditioning Tips:
Begin with a clarifying shampoo if you have product buildup, followed by a volumizing or hydrating conditioner. Focus conditioner on the mid-lengths and ends, avoiding heavy application at the roots, which can weigh them down. Rinse thoroughly to prevent residue.
Gentle Detangling:
Detangle your hair gently while it’s still wet and coated with conditioner, using a wide-tooth comb or your fingers. Avoid aggressive brushing that can cause frizz and damage, especially before drying.
Micro-Plopping or Towel Drying Gently:
Instead of vigorously rubbing your hair with a regular towel (which causes frizz), opt for a microfiber towel or an old cotton t-shirt. Gently “micro-plop” your hair by scrunching sections towards your scalp, or wrap your hair in the towel for 10-15 minutes to absorb excess water without disturbing your curl pattern. This step is crucial for leaving enough moisture for product absorption but removing enough water to reduce drying time.
Applying Styling Products Evenly:
As mentioned, apply your root lift product to damp roots. Then, evenly distribute your chosen styling product (mousse, gel, or curl cream) through the rest of your hair. Ensure even saturation, as patchy application can lead to uneven results.
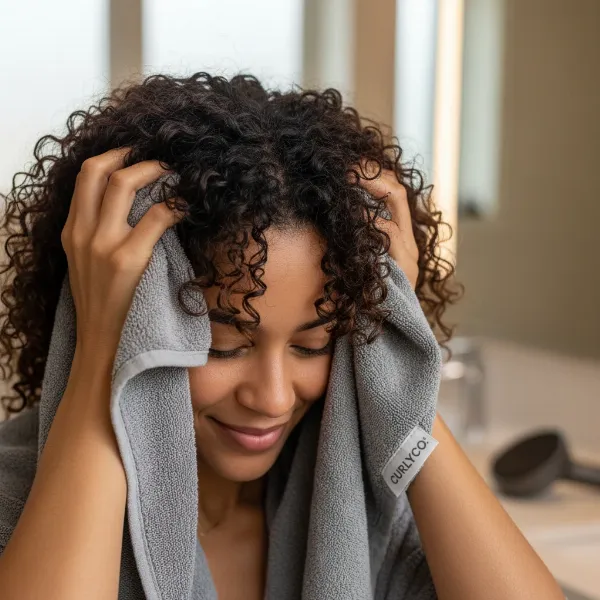 A person gently micro-plopping their hair with a microfiber towel before using a diffuser for root lift.
Step-by-Step Guide: Achieving Root Lift with a Diffuser
Now that your hair is prepped and products are applied, it’s time to diffuse for that coveted root lift. Patience and technique are your best friends here.
1. Initial Setup and Head Position:
Attach your diffuser to your hairdryer. Set your dryer to a low to medium heat and low speed. High heat can cause frizz and damage, while high speed can blow your curl pattern out. For maximum root lift, flip your head completely upside down. This allows gravity to pull your hair away from your scalp, creating immediate volume. Alternatively, you can lean to one side, then the other.
2. The “Pixie Diffusing” or “Pulsing” Technique for Roots:
With your head upside down, take sections of your hair and gently cup them into the diffuser bowl, pushing the diffuser towards your scalp. Once the hair is in the bowl, turn on the dryer for about 30-60 seconds, holding it steady at the roots. Then, turn off the dryer before moving the diffuser to the next section. This “on-off” method, also known as pixie diffusing or pulsing, prevents frizz and allows your roots to set with lift. Focus on getting the roots mostly dry first.
3. Hover Diffusing for Length and Ends:
Once your roots are largely dry and lifted, you can transition to hover diffusing for the rest of your hair. Instead of cupping, simply hover the diffuser around the lengths and ends of your hair, allowing the gentle airflow to dry them without direct contact. You can also occasionally cup sections of the lengths and ends for added curl definition.
4. The Cool Shot for Setting Volume:
When your hair is about 80-90% dry, use the “cool shot” button on your hairdryer. This blasts cold air, helping to set your curls and lock in the volume and lift you’ve created. Do this by cupping sections of hair in the diffuser and using the cool shot for 10-20 seconds per section.
5. Drying Percentage and Finishing Touches:
Avoid drying your hair 100% until it’s bone dry. Leaving a little bit of moisture (around 10-20%) allows your hair to air dry the rest of the way, which further helps to prevent frizz and maintain softness. Once dry, gently “scrunch out the crunch” if you used a gel, by lightly squeezing your hair with your hands. Avoid touching your hair too much until it’s completely dry to prevent frizz.
Advanced Techniques and Tips for Maximum Volume
For those who crave even more lift and volume, these advanced techniques can make a significant difference.
- Clipping Roots for Extra Height: Before diffusing, use small root clips (also known as duckbill clips) at the base of your roots, lifting them perpendicular to your scalp. Diffuse with the clips in place, focusing airflow at the roots. Remove the clips once the roots are dry. This technique provides dramatic lift.
- Alternating Head Positions: Don’t just stay upside down. Lean to the left, diffuse, lean to the right, diffuse, and then flip your head back. This varying angle of gravity helps to create volume from all sides.
- Using a Pick or Fingers After Drying: Once your hair is completely dry, you can gently slide a hair pick or your fingertips into your roots and lightly lift them for a final boost of volume. Be careful not to disrupt your curl pattern too much.
- The Importance of Patience: Rushing the diffusing process can lead to frizz and flat roots. Take your time, use low heat and speed, and allow each section to set before moving on. Slow and steady wins the volume race.
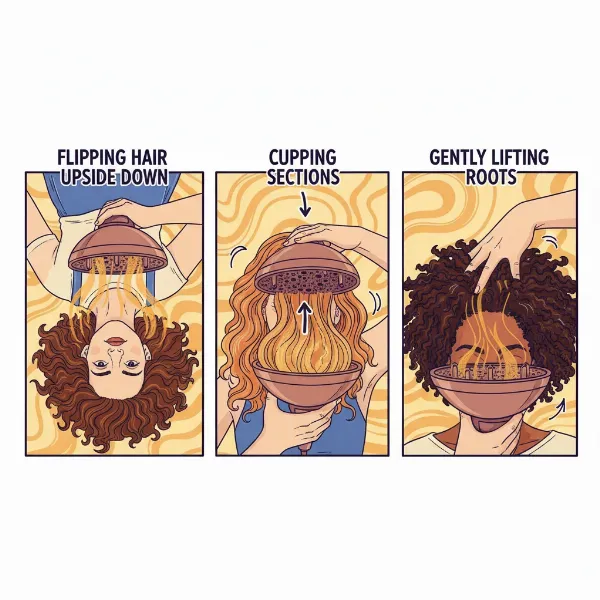 Various techniques for using a diffuser to achieve maximum hair volume and root lift.
Common Mistakes to Avoid for Perfect Root Lift
Even with the best intentions, certain practices can sabotage your efforts to achieve beautiful root lift. Being aware of these common mistakes can help you avoid them.
- Over-Touching Hair During Drying: Constantly running your fingers through your hair while it’s drying is a surefire way to create frizz and lose definition and volume. Let the diffuser do its work.
- Using Too High Heat or Speed: While it might seem faster, high heat and speed settings can lead to heat damage, frizz, and cause your curls to lose their pattern and your roots to fall flat. Always stick to low or medium settings.
- Drying Hair 100% Until Bone Dry: Over-drying can lead to stiff, crunchy hair, or worse, dry and frizzy strands. Aim for 80-90% dry and let the rest air dry.
- Not Using Enough (or Too Much) Product: Too little product won’t provide the necessary hold and volume. Too much can weigh your hair down, making it flat. Find the right balance for your hair type.
- Starting with Soaking Wet Roots: While you want damp hair, if your roots are dripping wet, they will take longer to dry and be more prone to flatness. Ensure roots are towel-dried enough to be damp, not soaked.
- Neglecting the Cool Shot: Skipping the cool shot means your curls and volume aren’t properly set, making them more likely to fall flat quicker.
Maintaining Your Root Lift Throughout the Day
Achieving stunning root lift is one thing; making it last is another. A few simple maintenance tips can help preserve your voluminous style.
- Refreshing Techniques: On non-wash days, if your roots start to flatten, lightly mist them with a curl refreshing spray or water, then gently lift with your fingers or a pick. A very quick, low-heat diffuser touch-up can also reactivate volume.
- Sleeping Tips to Preserve Volume: To maintain root lift overnight, consider sleeping on a satin or silk pillowcase to reduce friction. You can also loosely pineapple your hair on top of your head with a satin scrunchie to keep roots lifted and curls protected.
- Product Touch-ups: If needed, a small amount of volumizing spray or dry shampoo at the roots can add a quick boost during the day. Apply sparingly to avoid buildup.
Conclusion
Mastering How To Get Root Lift With A Diffuser Attachment is a game-changer for anyone seeking fuller, more voluminous hair, especially those with natural waves and curls. By understanding the function of your diffuser, selecting the right products, preparing your hair meticulously, and applying precise drying techniques, you can transform flat roots into a crown of beautifully lifted, bouncy hair. Remember to be patient, avoid common mistakes, and don’t forget the power of a cool shot. With these steps, your journey to incredible hair volume from the root up is within reach. What are your favorite diffuser tips for achieving maximum root lift?
Frequently Asked Questions
Why are my roots flat after diffusing?
|
Our Picks for the Best Hair Dryer in 2026
As an Amazon Associate I earn from qualifying purchases.
|
||
| Num | Product | Action |
|---|---|---|
| 1 | INFINITI PRO by CONAIR Hair Dryer, 1875W Blow Dryer with Diffuser and Concentrator, Ceramic Technology, 3 Heat & 2 Speed Settings, Cold Shot Button, Black |

|
| 2 | Wicked Elphaba Hair Dryer with Diffuser from Conair - INFINITIPRO by CONAIR Hair Dryer with Ceramic Technology - Includes Diffuser and Concentrator |
|
| 3 | Wicked Glinda Hair Dryer with Diffuser from Conair - INFINITIPRO by CONAIR Hair Dryer with Ceramic Technology - Includes Diffuser and Concentrator |
|
| 4 | Wavytalk Hair Dryer, Blown Away Ionic Hair Dryer for Curly Hair with Diffuser, 1875W Fast Drying Blow Dryer with Ceramic Technology, 3 Attachments for All Hair Types, Light and Quiet, Rose Gold |
|
| 5 | Conair Double Ceramic Hair Dryer, 1875W Blow Dryer with Diffuser and Concentrator, Ionic Conditioning, 3 Heat & 2 Speed Settings, Amazon Exclusive, White |
|
| 6 | Infiniti PRO CONAIR Hair Dryer with Diffuser, Professional AC Motor, Tourmaline Ceramic Technology Blow Dryer, Includes Concentrator and Blowout Brush, Amazon Exclusive, Gray |
|
| 7 | Conair Double Ceramic Hair Dryer - Blow Dryer with Ionic Conditioning - Includes Concentrator |
|
| 8 | Wavytalk Hair Dryer with Diffuser, Blown Away Ionic Hair Dryer for Curly Hair with Comb, 1875W Fast Drying Blow Dryer with Ceramic Technology, 3 Attachments for All Hair Types, Light and Quiet, Black |
|
| 9 | Infiniti PRO CONAIR Hair Dryer with Diffuser and Concentrator, 1875W Style & Shine Blow Dryer with Tourmaline and Ionic Conditioning to Fight Frizz, 3 Heat & 2 Speed Settings, Blue |
|
| 10 |
|
|
Flat roots after diffusing often result from starting with roots that are too wet, using too much product at the scalp, or not adequately lifting and setting the roots during the drying process. Ensure you micro-plop properly and focus on pixie diffusing directly at the roots with your head upside down.
Can I get root lift with a diffuser on straight hair?
While diffusers are primarily designed for textured hair, you can achieve some root lift on fine or slightly wavy straight hair by applying a volumizing mousse at the roots and diffusing upside down on low heat. However, the effect will be less dramatic than on curly hair.
What heat setting should I use for diffusing?
Always use a low to medium heat setting when diffusing. High heat can cause frizz, damage your hair, and disrupt your natural curl pattern, leading to less defined curls and potentially flattening your roots. Low heat protects your hair and allows curls to set gently.
How long should I diffuse for root lift?
The duration depends on your hair density and length, but generally, focus on drying your roots for 10-15 minutes using the “pixie diffusing” technique. The entire diffusing process for your whole head might take 20-40 minutes until your hair is 80-90% dry.
Is it bad to diffuse every day?
Diffusing every day with low to medium heat settings is generally not harmful, especially if you use a heat protectant. However, overuse of any heat styling can still cause some stress to your hair. Consider air-drying or refreshing methods on some days to give your hair a break.