For anyone blessed with natural waves, curls, or coils, achieving that coveted blend of definition, volume, and frizz-free bounce often feels like a daily battle. While air drying can be time-consuming and traditional blow drying can lead to a frizzy, undefined mess, there’s a game-changing tool that curly-haired individuals swear by: the hair diffuser. This simple attachment can revolutionize your hair routine, transforming unruly locks into perfectly sculpted spirals. This guide will walk you through everything you need to know about diffusers, from understanding their magic to mastering the techniques for your best curls ever.
Understanding Hair Diffusers: Your Guide to Perfect Curls
|
Our Picks for the Best Hair Dryer in 2026
As an Amazon Associate I earn from qualifying purchases.
|
||
| Num | Product | Action |
|---|---|---|
| 1 | INFINITI PRO by CONAIR Hair Dryer, 1875W Blow Dryer with Diffuser and Concentrator, Ceramic Technology, 3 Heat & 2 Speed Settings, Cold Shot Button, Black |

|
| 2 | Conair Double Ceramic Hair Dryer, 1875W Blow Dryer with Diffuser and Concentrator, Ionic Conditioning, 3 Heat & 2 Speed Settings, Amazon Exclusive, White |
|
| 3 | Wavytalk Hair Dryer, Blown Away Ionic Hair Dryer for Curly Hair with Diffuser, 1875W Fast Drying Blow Dryer with Ceramic Technology, 3 Attachments for All Hair Types, Light and Quiet, Rose Gold |
|
| 4 | Wicked Elphaba Hair Dryer with Diffuser from Conair - INFINITIPRO by CONAIR Hair Dryer with Ceramic Technology - Includes Diffuser and Concentrator |
|
| 5 | Conair Double Ceramic Hair Dryer - Blow Dryer with Ionic Conditioning - Includes Concentrator |
|
| 6 | INFINITI PRO by CONAIR Hair Dryer, 1875W Blow Dryer with Diffuser and Concentrator Attachments, AC Motor with Ceramic Technology, 3 Heat & 2 Speed Settings, Plum |
|
| 7 | Wavytalk Hair Dryer with Diffuser, Blown Away Ionic Hair Dryer for Curly Hair with Comb, 1875W Fast Drying Blow Dryer with Ceramic Technology, 3 Attachments for All Hair Types, Light and Quiet, Black |
|
| 8 | Infiniti PRO CONAIR Hair Dryer with Diffuser, Professional AC Motor, Tourmaline Ceramic Technology Blow Dryer, Includes Concentrator and Blowout Brush, Amazon Exclusive, Gray |
|
| 9 | Infiniti PRO CONAIR Hair Dryer with Diffuser and Concentrator, 1875W Style & Shine Blow Dryer with Tourmaline and Ionic Conditioning to Fight Frizz, 3 Heat & 2 Speed Settings, Blue |
|
| 10 | Wicked Glinda Hair Dryer with Diffuser from Conair - INFINITIPRO by CONAIR Hair Dryer with Ceramic Technology - Includes Diffuser and Concentrator |
|
The Science Behind Diffusing: How It Works and Why It Matters
A hair diffuser is an ingenious attachment designed to clip onto your blow dryer, radically changing how airflow interacts with your hair. Unlike a standard nozzle that concentrates heat and air into a powerful stream, a diffuser disperses this air over a much larger area. This gentle, indirect heat helps dry your hair without disturbing its natural curl pattern, which is crucial for preventing frizz and maintaining definition.
Using a diffuser is vital for several reasons. Firstly, it significantly reduces frizz by preventing the aggressive airflow that can disrupt delicate curl clumps. Secondly, it enhances your natural curl pattern, allowing each wave and coil to form beautifully without being blown out of shape. Thirdly, diffusers are excellent for adding volume, especially at the roots, giving your hair a fuller, bouncier appearance. Lastly, while preserving curl integrity, it also speeds up drying time compared to air drying, making your routine more efficient. If you have curly, wavy, or coily hair, a diffuser is an indispensable tool for achieving consistent, salon-quality results at home.
 Woman happily showing off perfectly defined, frizz-free curls achieved with a hair diffuser.
Types of Hair Diffusers: Choosing the Right Tool
Diffusers come in various shapes and sizes, each offering unique benefits tailored to different hair types and preferences. Understanding these variations can help you select the ideal tool for your curl journey.
The most common type is the bowl or cup diffuser, which features a large, bowl-shaped surface with small prongs or “fingers.” These cradle sections of hair, allowing warm air to circulate gently, promoting even drying and enhanced definition. Hand-shaped diffusers often incorporate more prominent, finger-like projections designed to mimic the natural scrunching motion of your hand, providing excellent root lift and mimicking an air-dried look without excessive frizz. For those who travel frequently, sock diffusers offer a soft, collapsible fabric option that’s highly portable, though they may not provide the same level of volume or definition as their rigid counterparts. Lastly, you’ll encounter both universal diffusers, which are designed to fit most standard hairdryers, and integrated diffusers, specifically engineered to work seamlessly with high-end dryers like those from Dyson or Shark. Key features to consider across all types include prong length (longer for thicker hair), bowl depth (deeper for longer curls), and the design of the airflow holes for optimal heat distribution.
Important Criteria When Selecting a Diffuser
Choosing the perfect diffuser involves more than just picking the first one you see. Several key criteria should guide your decision to ensure it complements your hair type and styling goals.
First and foremost is compatibility; ensure the diffuser securely attaches to your existing hairdryer. A loose fit can lead to inefficiency and frustration. Next, consider the size and shape of the diffuser. Wider and deeper bowls are generally better for long, thick, or very dense hair, as they can accommodate more hair and promote larger curl clumps. Conversely, smaller diffusers might be more practical for fine or shorter hair. The material also plays a role; look for heat-resistant, durable plastics or silicone that won’t degrade quickly. The airflow design is critical—a good diffuser will have numerous, evenly distributed holes to ensure gentle, consistent drying without creating hot spots or disrupting curls. Finally, the prong design impacts volume and definition. Longer, softer prongs can provide excellent root lift and help shape curls, while some even offer a massaging effect for the scalp.
Comparison of Popular Diffuser Features
When comparing diffusers, focusing on design features rather than specific brands can help you understand what works best for your hair. Different diffusers excel in various aspects, catering to diverse needs and hair types.
| Feature Category | Description | Ideal For |
|---|---|---|
| Deep Bowl Diffusers | Features a large, cavernous bowl that can hold significant sections of hair, promoting large, defined curl clumps. | Long, thick, very dense curls needing comprehensive drying. |
| Adjustable Prongs | Prongs that can be extended or retracted, offering customizable lift and volume at the roots. | All curl types, allowing fine-tuning for desired volume. |
| Universal Fit | Designed with flexible collars to attach to a wide range of standard hairdryer nozzles. | Users with existing hairdryers, seeking versatility and value. |
| Integrated Diffuser | Custom-designed to fit specific premium hairdryers, ensuring optimal performance and secure attachment. | Owners of high-end dryers (e.g., Dyson, Shark) for seamless use. |
| Finger-like Prongs | Features distinct, often softer, finger-like projections that gently separate and lift curls. | Enhancing natural curl patterns, adding bounce without crunch. |
Understanding these distinctions allows you to select a diffuser that aligns with your specific hair length, thickness, and desired styling outcome.
How to Use Your Diffuser for Defined, Frizz-Free Curls
Mastering the art of diffusing involves a strategic approach, from preparation to the drying technique itself. Follow these steps to unlock the full potential of your curls.
Step 1: Prep Your Hair
Begin with clean, damp hair, not soaking wet. Gently squeeze out excess water using a microfiber towel or an old cotton t-shirt. Avoid harsh rubbing, which can lead to frizz. Next, liberally apply your preferred curl-enhancing products, such as a leave-in conditioner, curl cream, or gel, scrunching them into your hair from ends to roots. Always finish with a heat protectant to shield your strands from any potential heat damage. This product cocktail locks in moisture and helps define your curls before any heat is applied.
Step 2: Attach and Set
Securely attach your chosen diffuser to the nozzle of your hairdryer. It should fit snugly without wobbling. Set your hairdryer to a low or medium heat setting and a low speed. High heat can cause damage and frizz, while a gentle airflow is essential for preserving your curl pattern. Patience is key here; diffusing at a lower setting may take a little longer, but the results in definition and frizz control are well worth it.
Step 3: The Diffusing Technique
This is where the magic happens. Start by gently cupping a section of your hair with the diffuser bowl, lifting it towards your scalp. Hold it there for 20-30 seconds, allowing the warm, diffused air to dry the curls without disrupting them. Work your way around your head, section by section. For added volume, flip your head upside down and diffuse your hair from the roots upwards. You can also tilt your head from side to side to ensure even drying and maximum lift. Some experts recommend “hover diffusing” first, holding the diffuser a few inches away from your hair for the initial few minutes to help set your gel cast before cupping. Remember, resist the urge to touch your hair with your hands too much while it’s drying, as this is a primary cause of frizz.
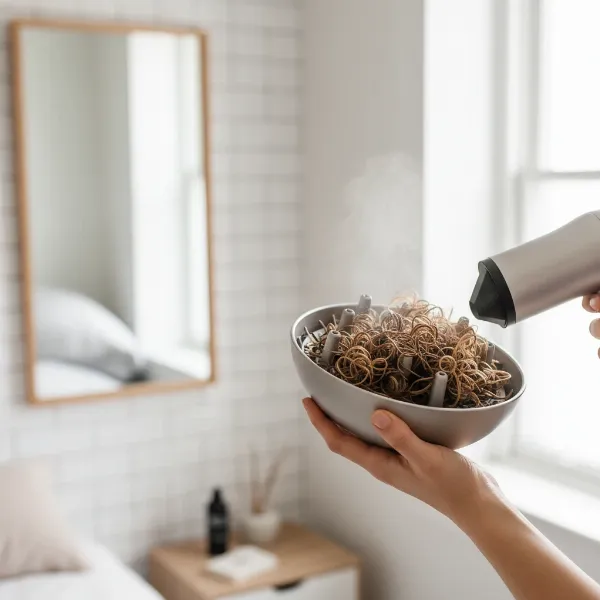 Hands gently cupping and lifting a section of damp curly hair with a diffuser attached to a hairdryer.
“The secret to perfectly diffused curls lies in minimal contact and maximum patience. Let the diffuser do the work; your hands should only guide the process, not interfere with the forming curl.” – Sarah Jenkins, Professional Curly Hair Specialist
Step 4: Finishing Touches
Once your hair is about 80% dry, you can switch off the hairdryer and let your curls air dry the rest of the way. This helps prevent over-drying and maintains elasticity. If you used a gel, your hair might feel a bit crunchy—this is called a “gel cast.” Gently “scrunch out the crunch” by lightly scrunching your dry curls with your hands until they feel soft and defined. For those who prefer a softer look, you can very gently separate larger curl clumps with your fingers, but avoid brushing or excessive manipulation.
Tips for Diffuser Maintenance
Proper care of your diffuser ensures its longevity and consistent performance, keeping your curls looking fabulous every time.
Regularly cleaning your diffuser is essential. Over time, product buildup, dust, and lint can accumulate in the air vents and on the prongs, hindering airflow and potentially spreading residue onto your hair. To clean, detach the diffuser from your hairdryer and use a damp cloth or a soft brush to wipe away any residue. For deeper cleaning, some diffusers can be gently washed with mild soap and water, ensuring they are thoroughly dry before reattaching. When not in use, store your diffuser in a place where its prongs won’t be bent or damaged. Many come with protective bags or cases, which are ideal for maintaining their shape and function.
Where to Purchase Quality Diffusers
Finding the right diffuser is easier than ever, with many options available both online and in physical stores. Knowing where to look can help you make an informed purchase.
Online retailers offer the broadest selection, from universal attachments to specialized diffusers designed for specific high-end hairdryers. Websites like Amazon, Ulta, Sephora, and directly from brand sites (e.g., Dyson, Shark, Bio Ionic) provide extensive product details, customer reviews, and comparative pricing, allowing you to research thoroughly before buying. For those who prefer a more hands-on approach and expert advice, beauty supply stores and large electronics retailers often carry a range of diffusers. In these settings, you might be able to test the fit with your hairdryer or receive personalized recommendations from staff. Additionally, some hairdryer brands offer diffuser bundles, which can be a cost-effective way to get a compatible hairdryer and diffuser together.
Buying Guide: Diffuser Price Segments
Diffusers are available across a spectrum of price points, catering to various budgets while offering different levels of features and performance.
Budget-friendly diffusers, typically ranging from $10-$30, are often universal attachments made from durable plastic or silicone. These are excellent for beginners or those on a tighter budget who want to experience the benefits of diffusing without a significant investment. They provide basic, effective air dispersion. The mid-range segment, usually between $30-$70, often includes diffusers with more advanced features, such as deeper bowls, more refined prong designs for better lift and definition, and improved materials. These might offer a better fit or more controlled airflow. At the high-end or premium level, priced from $70 upwards, you’ll find diffusers that are either integrated into advanced hairdryers (like the Dyson Supersonic or Shark SpeedStyle) or are premium universal attachments with specialized technology. These often boast superior design, enhanced airflow precision, and materials engineered for optimal heat distribution and hair health, justifying their higher cost through exceptional performance and durability.
Expert Tips for Diffusing Success
Achieving perfect curls with a diffuser is an art that can be perfected with a few expert insights.
A crucial tip from stylists is to never diffuse completely dry. Aim for around 80% dry with the diffuser, then allow the remaining moisture to evaporate naturally. This technique minimizes heat exposure and helps prevent frizz. “Many people make the mistake of over-drying their hair, which can lead to dullness and frizz,” says professional hairstylist, Jessica Taylor. “Stopping at 80% dry and letting your curls finish air-drying gives them that soft, natural finish.” Another common mistake is using too high a heat or speed setting; always opt for low heat and low speed to protect your delicate curl pattern. Finally, don’t be afraid to experiment with different products and techniques. Every curl pattern is unique, and finding your perfect routine might require a little trial and error with curl creams, gels, and diffusing angles. Consider incorporating a “plopping” step after washing to absorb excess water before you even start diffusing, which can cut down on drying time and enhance curl formation.
Conclusion
Embracing your natural curls with a diffuser is a transformative step towards consistently beautiful, defined, and frizz-free hair. By understanding how diffusers work, choosing the right type for your needs, and mastering the proper techniques, you can unlock unparalleled volume and definition. Remember to prep your hair with the right products, use low heat and speed settings, and employ gentle scrunching and lifting motions. With a little practice and patience, diffusers can turn what might have been a frustrating hair routine into an empowering journey of self-expression. Are you ready to discover the true potential of your curls and embrace perfect bounce every day?
Frequently Asked Questions
What does a hair diffuser actually do for curly hair?
A hair diffuser attaches to your blow dryer to disperse air evenly over a large area, rather than concentrating it. This gentle airflow helps to dry curly hair without disturbing its natural curl pattern, significantly reducing frizz, enhancing definition, and boosting volume for a softer, more structured look.
Can I use a diffuser on all curl types, including wavy or coily hair?
Yes, diffusers are highly versatile and beneficial for a wide range of textured hair, including wavy (2A-2C), curly (3A-3C), and coily (4A-4C) hair types. They help define waves, enhance ringlets, and stretch coils while minimizing shrinkage and frizz across the curl spectrum.
What are the best heat and speed settings to use when diffusing?
For optimal results and to prevent heat damage and frizz, it’s best to use your hairdryer on a low to medium heat setting and a low speed setting when diffusing. This ensures a gentle, consistent drying process that preserves the integrity of your curls.
How do I prevent frizz when diffusing my hair?
To prevent frizz, start with damp, product-prepped hair (including heat protectant and curl cream/gel). Use low heat and speed settings. Avoid touching your hair excessively with your hands while diffusing, as this disrupts the curl pattern. Gently cup sections of hair in the diffuser and hold them steady.
How long should I diffuse my hair, and should it be completely dry?
The drying time varies based on hair thickness and length, but aim to diffuse until your hair is about 80% dry. Allowing your hair to air dry for the final 20% minimizes heat exposure and helps prevent over-drying, which can lead to frizz and dullness.
Is it better to diffuse upside down or upright for volume?
Flipping your head upside down during diffusing is a highly effective technique for maximizing root volume. This position allows you to lift your curls away from your scalp, creating more body and bounce throughout your hair. You can also tilt your head side to side.
What products should I apply before diffusing for perfect curls?
Before diffusing, apply a leave-in conditioner to hydrate, followed by a curl-enhancing cream or gel to define your curls and provide hold. Always finish with a heat protectant spray to shield your hair from heat and ensure healthier, more resilient results.