For anyone with curly hair, the quest for a flawless, frizz-free blow dry can feel like an endless battle against humidity and unruly strands. The dream is bouncy, defined curls, but the reality often involves a halo of frizz. With the right techniques and products, however, achieving a smooth, vibrant blowout is entirely within reach, transforming your curly hair from unpredictable to perfectly styled.
Understanding Frizzy Hair
Frizz is the arch-nemesis of curly hair, and understanding its root cause is the first step to combating it. Frizz occurs when the outer layer of your hair, known as the cuticle, becomes raised or opened. This allows moisture from the air to penetrate the hair shaft, causing it to swell and appear rough, dry, and undefined. Curly hair is particularly prone to frizz because its natural structure makes it harder for natural oils to travel down the hair shaft, often leaving it drier and more susceptible to environmental factors like humidity. Excessive heat, friction from rough towels, and improper blow-drying techniques can also exacerbate this cuticle lift, leading to increased frizz.
Essential Tools for Frizz-Free Curls
The right tools are your best allies in the fight against frizz. Investing in quality equipment specifically designed for curly hair can make a significant difference in your blow-drying results.
- Hair Dryer with Ionic or Ceramic Technology: These types of dryers help to distribute heat more evenly and produce negative ions that break down water molecules faster, reducing drying time and sealing the hair cuticle for a smoother finish. Look for models with multiple heat and speed settings.
- Diffuser Attachment: This is non-negotiable for curly hair. A diffuser disperses the airflow over a wider area, preventing direct, harsh heat from disrupting your curl pattern and causing frizz. It helps to gently dry curls while maintaining their natural shape and definition.
- Microfiber Towel or Cotton T-Shirt: Traditional terry cloth towels can be too abrasive, causing friction that leads to frizz and breakage. A microfiber towel or a soft cotton t-shirt will absorb excess water gently without roughing up the hair cuticle.
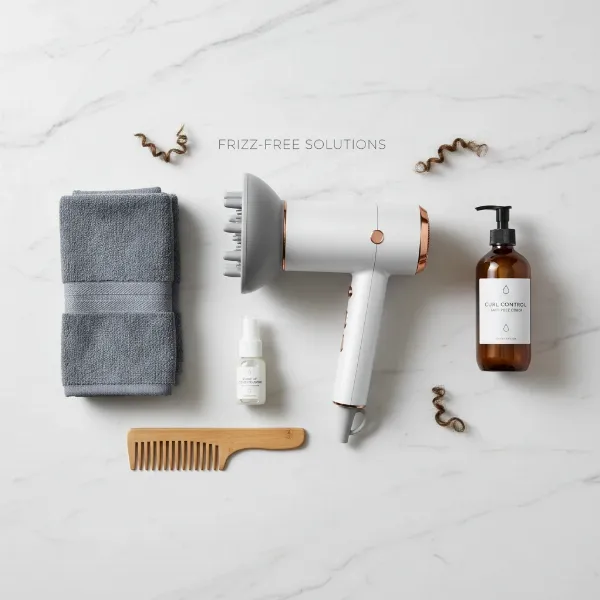 Essential tools for frizz-free curly hair blow drying including a hair dryer and diffuser.
Pre-Drying Preparation: The Foundation of Frizz Control
Proper preparation is crucial for a successful, frizz-free blow dry. What you do before you even turn on your dryer can significantly impact the final outcome.
Start with a good washing routine. Use sulfate-free shampoos and conditioners, as sulfates can strip natural oils, leaving hair drier and more prone to frizz. Follow up with a deep conditioner or hair mask regularly to provide essential hydration. After washing, gently squeeze excess water from your hair. Avoid vigorously rubbing your hair with a towel, which can cause significant friction and frizz. Instead, “plop” your hair by wrapping it in a microfiber towel or cotton t-shirt for 10-20 minutes to absorb moisture without disturbing the curl pattern.
Once your hair is damp, apply a leave-in conditioner and a heat protectant. A leave-in conditioner adds an extra layer of moisture and helps to detangle, while a heat protectant creates a barrier against heat damage, shielding your strands and locking in moisture. Ensure even distribution from roots to ends. Follow this with an anti-frizz serum, cream, or spray, which will further help to smooth the cuticle and prevent frizz as your hair dries.
Step-by-Step Guide to Blow Drying Curly Hair Without Frizz
With your hair prepped and tools ready, it’s time to master the blow-drying technique. Patience and a gentle approach are key to preserving your curls and preventing frizz.
1. Partially Air Dry Your Hair
Table is empty.Before introducing heat, let your hair air dry to about 70-80%. This minimizes the amount of time your curls are exposed to direct heat, reducing the risk of damage and frizz. If you’re in a hurry, you can use a blow-dry accelerant spray to speed up the process.
2. Section Your Hair
Divide your hair into manageable sections. Depending on your hair’s thickness, 4-8 sections typically work well. This ensures that each curl receives adequate attention and dries evenly, preventing missed spots that can later lead to frizz.
3. Apply Styling Products
While your hair is still damp in sections, apply your preferred styling products. This could be a curl-defining mousse, gel, or cream. These products help to enhance curl definition, provide hold, and create a barrier against humidity. Gently scrunch them into your curls.
4. Diffuse with Care
Attach the diffuser to your hair dryer. Set your dryer to a low heat and low to medium airflow setting. High heat dehydrates curly hair, which is already prone to dryness, and strong airflow can blow curls apart, leading to frizz.
- Cup Your Curls: Gently place a section of hair into the diffuser bowl, bringing it up towards your scalp.
- Hold and Lift: Hold the diffuser in place for a few seconds, allowing the heat to gently dry and set the curl pattern. Avoid moving the diffuser excessively while drying to prevent disruption.
- Work in Sections: Move from section to section, drying your hair about 80-90% of the way. Focus on the roots first to create volume.
- Gentle Movement: For added definition and to encourage your natural curl pattern, you can gently move the diffuser in a backward and forward “massaging” motion while the curls are cupped inside.
- Cool Shot Finish: Once each section is mostly dry, blast it with a cool shot of air for a few seconds. The cool air helps to seal the hair cuticle, lock in shine, and set your curls, further preventing frizz.
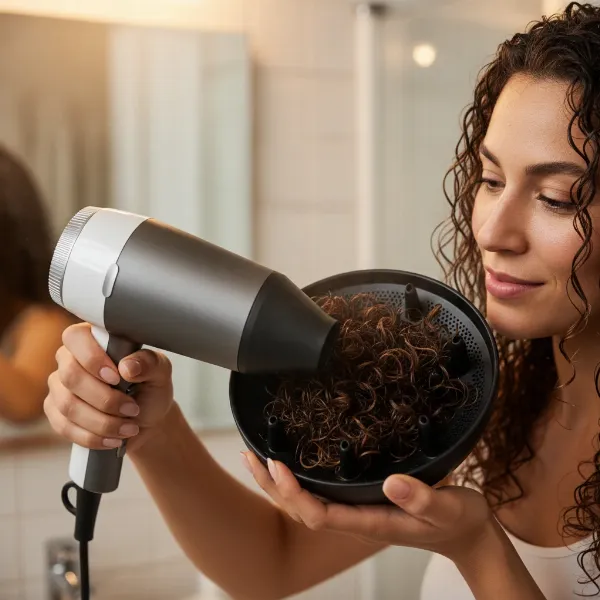 Woman using a diffuser on her damp curly hair to achieve frizz-free, defined curls.
5. Final Touches
Once your hair is mostly dry, gently remove your hair from the diffuser. Avoid touching your hair too much until it’s completely cool and dry to prevent frizz. If you need more definition for certain pieces, you can finger coil them or use a small amount of styling product.
Common Mistakes to Avoid for Smooth Curls
Even with the right tools and products, certain habits can sabotage your frizz-free efforts. Be mindful of these common blow-drying mistakes:
- Drying Soaking Wet Hair: This prolongs heat exposure and increases the likelihood of frizz and damage. Remember to partially air dry first.
- Using High Heat: Excessive heat strips moisture from your hair, making it brittle and frizzy. Always opt for low to medium heat settings.
- Holding the Dryer Too Close: Concentrating heat in one area can cause damage. Keep your dryer at least six inches away from your hair and move it constantly to distribute heat evenly.
- Rough Towel Drying: Vigorously rubbing your hair with a standard towel creates friction that raises the cuticle and leads to frizz and breakage.
- Not Using a Diffuser: Blowing air directly onto curly hair without a diffuser will inevitably lead to a frizzy, undefined mess.
- Over-Drying: Drying your hair until it’s bone-dry can remove too much moisture, leaving it stiff and frizzy. Aim for 90-95% dry, letting the remaining moisture air dry naturally.
Product Recommendations for Frizz-Free Blow Drying
Choosing the right products is a game-changer for achieving frizz-free curly hair. Here are key product categories and examples frequently recommended by experts:
- Heat Protectants: Essential for shielding hair from thermal damage. Look for sprays or creams that offer heat protection up to high temperatures.
- Leave-In Conditioners: Provide continuous hydration and detangling benefits. Lightweight sprays are excellent for fine to normal hair, while richer creams suit thicker, drier curls.
- Anti-Frizz Serums & Creams: These products work to smooth the hair cuticle and create a barrier against humidity. Popular options include:
- Kérastase Anti-Frizz Serum: A lightweight option suitable for all hair types.
- John Frieda Frizz Ease Extra Strength Serum: A drugstore favorite for reducing frizz without weighing hair down.
- Color Wow Dream Coat Supernatural Spray: Heat-activated spray known for its humidity-proofing capabilities.
- Olaplex No.6 Bond Smoother: Excellent for damaged hair, helping to smooth and strengthen.
- Ouai Anti-Frizz Crème: Formulated to combat frizz and enhance curl definition.
- Curl-Defining Mousses & Gels: These provide hold and definition to your curls. Apply them to damp, sectioned hair before diffusing.
- Hair Oils: Jojoba oil or argan oil can add shine and seal the hair cuticle post-drying, especially beneficial for thicker hair types.
“The secret to lasting frizz control isn’t just one product, but a strategic layering of hydration and protection from wash day to styling. It’s about empowering your curls, not fighting them.” – Samantha Jones, Professional Hairstylist specializing in Textured Hair
Maintaining Your Frizz-Free Blowout
Your effort doesn’t end when the blow dryer turns off. A few simple habits can help extend the life of your frizz-free curls and keep them looking their best.
- Protect Against Humidity: Finish your style with a light mist of anti-humidity spray, especially if you live in a damp climate. This creates an invisible shield against moisture that can quickly revert your curls to frizz.
- Minimize Touching: The more you touch your hair, the more you disrupt the cuticle and invite frizz. Once your hair is dry and set, try to keep your hands out of it.
- Sleep Smart: To preserve your curls overnight, consider sleeping on a silk or satin pillowcase. These materials create less friction than cotton, reducing frizz and tangles while you sleep. You can also loosely pineapple your hair (gather it into a high ponytail on top of your head) to maintain volume and curl shape.
- Refresh as Needed: On non-wash days, use a light curl refreshing spray or a tiny amount of anti-frizz serum to tame any flyaways or redefine curls. Avoid re-wetting your entire head, as this can reactivate frizz.
Buying Guide: Hair Dryer Technology for Frizz Control
When selecting a hair dryer, the technology it employs plays a significant role in its frizz-fighting capabilities. Understanding the differences can guide you to the perfect tool for your curly hair.
Ionic Hair Dryers
- Pros: Emit negative ions that break down water molecules on the hair surface, allowing them to evaporate faster. This leads to quicker drying times and helps to seal the hair cuticle, reducing frizz and enhancing shine. They are excellent for thick or frizzy hair.
- Cons: Can sometimes over-smooth fine hair, reducing volume.
- Best for: Thick, coarse, or very frizzy hair types that need extra smoothing.
Ceramic Hair Dryers
- Pros: Distribute heat evenly and consistently, preventing hot spots that can damage hair. Ceramic technology often incorporates infrared heat, which penetrates the hair shaft gently, drying it from the inside out and reducing heat exposure. This gentler heat is ideal for delicate curly strands.
- Cons: May not dry hair as quickly as ionic dryers, especially for very thick hair.
- Best for: Most curly hair types, especially those prone to damage or dryness, and for even heat distribution.
Tourmaline Hair Dryers
- Pros: Tourmaline is a semi-precious mineral that, when crushed and infused into dryer components, produces even more negative ions than ceramic dryers. This results in faster drying, superior frizz reduction, and an exceptionally smooth, shiny finish. Tourmaline often combines with ceramic for a powerful yet gentle drying experience.
- Cons: Typically more expensive than ceramic or basic ionic models.
- Best for: Anyone seeking maximum frizz control, exceptional shine, and faster drying, particularly those with very thick, coarse, or highly frizz-prone curly hair.
Cordless Hair Dryers
- Pros: Offer ultimate portability and freedom of movement, making them ideal for travel or styling on the go.
- Cons: Generally less powerful than corded versions, with shorter battery life. May not provide the optimal heat and airflow settings for serious frizz control on thick curly hair.
- Best for: Touch-ups, light drying, or individuals with finer curls who prioritize mobility over intense styling power.
When choosing a Hair Dryer, consider your hair type, desired results, and budget. For curly hair, a dryer with ceramic or tourmaline technology and multiple heat/speed settings, paired with a high-quality diffuser, will be your best investment.
Conclusion
Taming frizzy curly hair with a blow dryer requires more than just technique; it’s a holistic approach that combines careful preparation, the right tools, and consistent aftercare. By understanding what causes frizz, adopting a gentle blow-drying method with a diffuser, and utilizing products designed to nourish and protect your curls, you can achieve salon-worthy, frizz-free results at home. Remember, your curly hair is unique and beautiful—give it the care it deserves to let its natural bounce and shine truly emerge. What new technique or product will you incorporate into your routine to achieve your perfect frizz-free curls?
Frequently Asked Questions
How long should I air dry my curly hair before blow drying to avoid frizz?
Ideally, let your curly hair air dry to about 70-80% before you begin blow drying with a diffuser. This significantly reduces heat exposure and helps to maintain curl definition, minimizing the chances of frizz. It also cuts down on overall drying time.
Can I blow dry curly hair without a diffuser?
While technically possible, blow drying curly hair without a diffuser is highly likely to cause frizz. The direct, concentrated airflow from a standard nozzle will disrupt your curl pattern and blast the cuticles open, leading to a frizzy, undefined look. A diffuser is essential for gentle, even drying.
What temperature is best for blow drying curly hair to prevent frizz?
Always use a low to medium heat setting when blow drying curly hair. High heat can strip your hair of its natural moisture, making it dry, brittle, and more susceptible to frizz. The goal is gentle drying that encourages curl formation without causing damage.
What kind of products should I use before blow drying curly hair for frizz control?
Before blow drying, use a leave-in conditioner to hydrate, a heat protectant to shield against thermal damage, and an anti-frizz serum or cream. These products work together to smooth the cuticle, lock in moisture, and create a barrier against humidity, crucial for preventing frizz.
Is it better to blow dry curly hair upside down or right side up?
Drying your hair upside down can help create more volume at the roots, especially when using a diffuser. However, you can also achieve excellent results drying right side up, focusing on gently scooping and diffusing sections. The key is to avoid rough movement and use low heat/airflow.
How can I make my frizz-free blow dry last longer?
To extend your frizz-free blowout, avoid touching your hair excessively, sleep on a silk or satin pillowcase to reduce friction, and use a light anti-humidity spray as a finishing touch. These steps help maintain the smoothed cuticle and protect against environmental moisture.