Embracing a pixie cut is a statement of style, confidence, and modern elegance. But while short hair often promises ease, styling it to perfection with a hair dryer can sometimes feel like a delicate art. As a technician with over a decade of hands-on experience in hair dryers, I’ve seen countless tools and techniques. My goal is to equip you with the practical knowledge to transform your pixie from a simple dry to a stunning style, perfectly tailored to your needs and budget. Let’s unlock the secrets to a flawless, styled pixie!
Essential Hair Dryer Types for Pixie Cuts
Choosing the right hair dryer is the first step to mastering your pixie cut. Different technologies cater to various hair needs, ensuring your short style looks its best without damage.
- Ionic Hair Dryers: These dryers emit negatively charged ions that break down water molecules quickly, speeding up drying time and sealing the hair cuticle. This results in a smoother, shinier finish with significantly less frizz. Ionic dryers are particularly beneficial for pixies prone to frizz or those seeking a sleek, polished look.
- Ceramic Hair Dryers: Ceramic components distribute heat evenly and emit infrared heat, which penetrates the hair shaft gently from the inside out. This makes them ideal for fine or delicate pixie cuts, as they prevent hot spots and reduce the risk of heat damage. Ceramic dryers are excellent for achieving gentle, consistent heat that’s kinder to your hair.
- Tourmaline Hair Dryers: Often combined with ceramic or ionic technology, tourmaline amplifies the benefits of these materials. It emits even more negative ions and infrared heat, leading to faster drying times and enhanced frizz reduction. Tourmaline dryers are a great choice for those with thicker pixies or anyone needing extra smoothness and shine.
- Cordless Hair Dryers: While offering unparalleled portability and freedom of movement, cordless options typically have lower wattage and shorter battery life compared to their corded counterparts. For intricate styling that requires sustained power, a corded dryer is often preferred. However, for quick touch-ups or travel, a cordless model can be a convenient backup.
Key Factors When Choosing a Hair Dryer for Pixie Cuts
Selecting the perfect hair dryer involves more than just picking a color. Understanding these crucial factors will help you find a tool that enhances your pixie cut’s natural beauty and simplifies your styling routine.
- Wattage: For pixie cuts, you don’t necessarily need the highest wattage, but sufficient power (1500-1875W) ensures efficient drying. Higher wattage generally means a more powerful motor and faster airflow, reducing overall drying time. This is beneficial for quick styling without excessive heat exposure.
- Temperature Settings: Multiple heat settings are vital. Short hair can be more susceptible to heat damage, so the ability to select lower temperatures is key. Always start with a medium heat setting and adjust as needed, finishing with a cool shot to set your style.
- Airflow Speed: Adjustable airflow settings allow for greater control. A high-speed setting is great for initial rough drying, while a lower, more controlled speed is perfect for precision styling around the face and crown, preventing your short strands from blowing wildly.
- Technology (Ionic, Ceramic, Tourmaline): As discussed, these technologies significantly impact hair health and finish. For a frizz-free, smooth, or healthy-looking pixie, opt for dryers incorporating these features.
- Design:
- Weight: A lightweight dryer is crucial for ease of handling, especially when you’re using brushes for detailed styling. Your arm won’t tire as quickly.
- Noise Level: While some noise is inevitable, a quieter dryer makes the styling experience more pleasant, particularly for daily use.
- Ergonomics: Look for a balanced design with easy-to-reach controls for comfortable and precise styling.
- Attachments:
- Concentrator Nozzle: This flat attachment directs airflow precisely, ideal for smoothing sections and creating sleek styles.
- Diffuser: For wavy or curly pixies, a diffuser spreads air gently to enhance natural texture, add volume, and minimize frizz without disturbing curl patterns.
Step-by-Step Guide: Styling Your Pixie Cut with a Hair Dryer
Mastering your pixie cut with a hair dryer involves more than just blasting hot air. Here’s a comprehensive guide to achieving various looks, from sleek to voluminous.
Pre-Styling Preparation
|
Our Picks for the Best Hair Dryer in 2026
As an Amazon Associate I earn from qualifying purchases.
|
||
| Num | Product | Action |
|---|---|---|
| 1 | INFINITI PRO by CONAIR Hair Dryer, 1875W Blow Dryer with Diffuser and Concentrator, Ceramic Technology, 3 Heat & 2 Speed Settings, Cold Shot Button, Black |

|
| 2 | Wavytalk Hair Dryer, Blown Away Ionic Hair Dryer for Curly Hair with Diffuser, 1875W Fast Drying Blow Dryer with Ceramic Technology, 3 Attachments for All Hair Types, Light and Quiet, Rose Gold |
|
| 3 | Wicked Glinda Hair Dryer with Diffuser from Conair - INFINITIPRO by CONAIR Hair Dryer with Ceramic Technology - Includes Diffuser and Concentrator |
|
| 4 | Conair Double Ceramic Hair Dryer - Blow Dryer with Ionic Conditioning - Includes Concentrator |
|
| 5 | Conair Double Ceramic Hair Dryer, 1875W Blow Dryer with Diffuser and Concentrator, Ionic Conditioning, 3 Heat & 2 Speed Settings, Amazon Exclusive, White |
|
| 6 | Wavytalk Hair Dryer with Diffuser, Blown Away Ionic Hair Dryer for Curly Hair with Comb, 1875W Fast Drying Blow Dryer with Ceramic Technology, 3 Attachments for All Hair Types, Light and Quiet, Black |
|
| 7 | Infiniti PRO CONAIR Hair Dryer with Diffuser and Concentrator, 1875W Style & Shine Blow Dryer with Tourmaline and Ionic Conditioning to Fight Frizz, 3 Heat & 2 Speed Settings, Blue |
|
| 8 | Wicked Elphaba Hair Dryer with Diffuser from Conair - INFINITIPRO by CONAIR Hair Dryer with Ceramic Technology - Includes Diffuser and Concentrator |
|
| 9 | INFINITI PRO by CONAIR Hair Dryer, 1875W Blow Dryer with Diffuser and Concentrator Attachments, AC Motor with Ceramic Technology, 3 Heat & 2 Speed Settings, Plum |
|
| 10 | Infiniti PRO CONAIR Hair Dryer with Diffuser, Professional AC Motor, Tourmaline Ceramic Technology Blow Dryer, Includes Concentrator and Blowout Brush, Amazon Exclusive, Gray |
|
Start with a clean canvas. After washing, gently towel dry your hair until it’s about 80% dry. Using a microfiber towel can help reduce frizz and protect your hair from damage. Next, apply a heat protectant spray evenly throughout your damp hair to shield it from heat damage. This creates a barrier between your strands and the heat from the blow dryer.
Applying Styling Products
The right products create the foundation for your desired style:
- For Volume and Texture: Apply a quarter-sized amount of texturizing spray or mousse, focusing on the roots. This adds structure and memory to your style.
- For Sleekness: A light heat-protecting cream or serum can add “slip” and softness, helping to manage texture and enhance shine.
- For Curly Pixies: Scrunch a holding gel made for curly hair into the ends to define your natural waves or curls.
Basic Drying Techniques
Begin by rough drying your hair on a medium heat and speed setting until it’s mostly dry. This removes excess moisture and preps your hair for more focused styling.
Styling Techniques for Different Pixie Looks
Sleek & Smooth Pixie
For a polished, smooth finish, Edward Tedeschi, a cutting specialist, recommends a “wrap dry technique.” This involves brushing your hair back and forth around your head with your hair dryer pointed down. This method allows natural movement while smoothing the hair using the natural curve of your head.
- Back: Start with the back of your head. Using a soft-bristle brush, comb your hair downwards while directing the dryer’s airflow downwards to dry it flat. This is particularly effective for taming cowlicks.
- Sides: For the sides, use a brush to push your hair forwards, then backwards, then forwards again as you dry it. Keep the dryer pointed down to achieve a sleek finish and avoid making the hair stick out.
- Top: Use a concentrator nozzle and a flat brush to smooth the top sections, guiding the hair in the direction you want it to lay.
Voluminous & Textured Pixie
Achieving lasting volume at the crown without heavy products is possible with a mechanical lift technique.
- Crown Lift: Flip your hair forward or section off the crown area. Using a medium to large round brush, roll a small crown section underneath, starting at the roots. Direct your blow dryer’s airflow toward the root for 10-15 seconds, rolling the brush upward and outward.
- Set with Cool Shot: Crucially, don’t skip the “cool shot” button on your hair dryer. Once you’ve heated the roots to create lift, use cool air to set the volume in place. This helps lock in the shape.
- Sides & Back: For added texture on the sides, use your fingers to lift and direct hair as you dry, rather than a brush, for a more piecey look.
- Finish: Allow your hair to cool completely before gently flipping it back into your natural part. This method helps the crown stay voluminous with a soft, natural shape.
Curly/Wavy Pixie
Embrace your natural texture with these steps:
- Product Application: After towel drying, scrunch in your preferred curl cream or holding gel, focusing on the ends.
- Use a Diffuser: Attach a diffuser to your hair dryer. This attachment disperses air gently, minimizing frizz and enhancing your natural curl pattern.
- Low Heat: Use the lowest heat setting your dryer offers. High heat can damage and dry out curly hair, leading to frizz.
- Technique: Press the diffuser up against your scalp, gathering sections of your hair inside the nozzle. Move the dryer around your head every 10-15 seconds, avoiding staying in one spot for too long to prevent damage and over-drying.
- Hands Off: As Edward Tedeschi advises, for a natural or curly effect, apply products and try not to touch your hair until it is completely dry. The more you scrunch or play with it while drying, the more frizz can emerge.
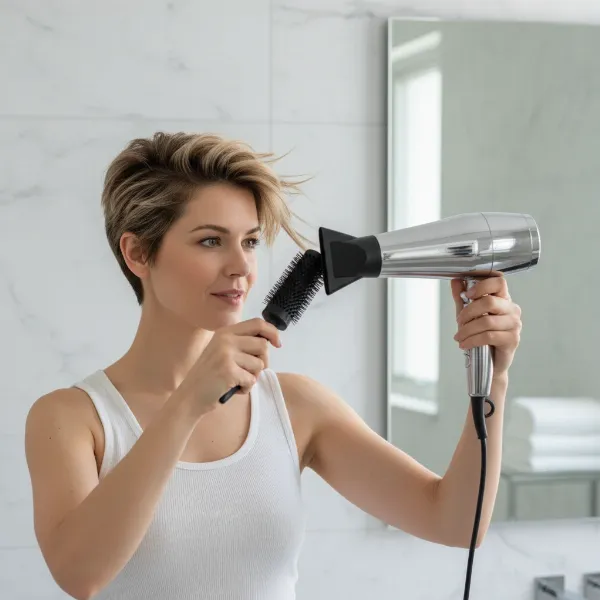 A person with a short pixie cut using a hair dryer with a concentrator nozzle and a round brush to add volume.
Tips for Protecting Your Pixie Cut While Blow-Drying
Even with short hair, heat damage is a real concern. Incorporating these protective tips will keep your pixie cut looking healthy and vibrant.
- Always Use Heat Protectant: This is non-negotiable. A good heat protectant forms a barrier, minimizing damage from hot airflow.
- Choose the Right Attachments: A concentrator nozzle allows for precise airflow, preventing excessive heat on one area, while a diffuser is essential for delicate curly textures to prevent frizz.
- Maintain Distance and Movement: Keep the hair dryer moving constantly. Avoid holding it too close to your scalp or staying in one spot for more than a few seconds. This prevents hot spots and over-drying, which can lead to breakage and dullness.
- Embrace the Cool Shot: The cool shot button helps to seal the hair cuticle, lock in your style, and add shine, reducing the need for prolonged heat exposure.
- Prioritize Hair Health: “Opting for mechanical volume over chemical support reduces buildup, leading to a healthier scalp and more breathable hair,” notes Mariah Lin, a Salon Educator. Clean roots tend to hold volume longer because they aren’t weighed down by product.
Maintaining Your Hair Dryer for Optimal Pixie Styling
A well-maintained hair dryer performs better and lasts longer, ensuring your pixie cut always looks its best.
- Clean the Filter Regularly: Hair dryer filters can accumulate lint, dust, and hair, restricting airflow and causing the motor to overheat. Clean it after every few uses to maintain optimal performance and prevent damage to the appliance.
- Proper Storage: Store your hair dryer in a safe place where it won’t get tangled or damaged. Avoid wrapping the cord tightly around the dryer, as this can fray the internal wires over time.
- Troubleshooting Common Issues: If your dryer loses power or isn’t heating properly, check the filter first. Ensure the power outlet is functioning, and inspect the cord for any visible damage. For persistent issues, consult a professional or consider replacement.
Where to Buy the Best Hair Dryers for Pixie Cuts
Finding the ideal hair dryer for your pixie cut is easier with reliable sources.
- Reputable Electronics Stores: Stores like Best Buy often carry a wide range of brands, from high-end to more affordable options, allowing you to physically compare models and attachments.
- Specialty Beauty Supply Stores: These stores offer professional-grade dryers and styling tools, often with expert staff who can provide personalized recommendations based on your hair type and styling needs.
- Online Retailers: Websites like Amazon, Sephora, and directly from brand websites (e.g., Dyson, ghd) provide extensive selections, user reviews, and competitive pricing. When buying online, always verify seller reputation and return policies.
Buying Guide: Hair Dryer Price Segments for Pixie Cuts
Your budget can influence the features and durability of your hair dryer, but excellent options exist across all price points.
- Budget-Friendly Options (Under $50): These dryers are typically basic but functional. They often include essential heat and speed settings and a concentrator nozzle. While they might lack advanced technology like ionic or ceramic, they can still effectively dry and style a pixie cut with proper heat protection. Look for models from brands like Conair or Revlon.
- Mid-Range Options ($50-$150): In this segment, you’ll find dryers that incorporate basic ionic or ceramic technology, offering better frizz control and more even heat distribution. They usually come with more heat/speed settings, possibly a cool shot, and sometimes a diffuser. Brands like Panasonic and higher-end Conair or Revlon models fall into this category. These provide a good balance of features and affordability.
- High-End/Professional Options (Over $150): This category includes premium dryers from brands like Dyson, ghd, Shark, or T3. They feature advanced technologies (powerful digital motors, multiple ion generators, intelligent heat control), superior build quality, lightweight designs, and a full suite of attachments. These dryers often offer faster drying times, enhanced hair health benefits, and exceptional styling precision, making them a worthwhile investment for those seeking salon-quality results and long-term durability.
Conclusion
Styling a pixie cut with a hair dryer doesn’t have to be a daily challenge. By understanding the different hair dryer technologies, choosing the right tools, and applying effective styling techniques, you can effortlessly achieve a range of looks from sleek to voluminous. Remember the importance of heat protection and proper dryer maintenance to keep your hair healthy and your tool performing optimally. Which pixie style will you master first this week?
Frequently Asked Questions
What is the best way to get volume in a short pixie cut using a dryer?
To add volume to a short pixie cut, focus on the roots. After applying heat protectant, use a round brush at the crown, directing the dryer’s airflow upwards for 10-15 seconds. Finish with a cool shot to set the lift, flipping your hair back after it cools for natural, lasting volume.
Can I use a regular hair dryer on a pixie cut, or do I need a special one?
While a regular hair dryer can work, one with adjustable heat and speed settings, along with a concentrator nozzle, is highly recommended. Ionic or ceramic technologies also provide benefits like reduced frizz and heat protection, making styling a pixie cut easier and healthier for your hair.
How do I prevent frizz when blow-drying my pixie cut?
To prevent frizz, start with towel-dried hair (around 80% dry) and apply a heat protectant. Use an ionic or ceramic hair dryer, which helps smooth the cuticle. For curly pixies, always use a diffuser on a low heat setting and avoid touching your hair until it’s completely dry.
What styling products are essential for pixie cuts when using a hair dryer?
Heat protectant spray is absolutely essential for all styling. For volume, a lightweight mousse or texturizing spray at the roots is effective. If you have a curly pixie, a good holding gel or curl cream can help define your natural texture and prevent frizz.
How often should I clean my hair dryer filter?
It’s recommended to clean your Hair Dryer’s filter regularly, ideally after every few uses. A clogged filter can restrict airflow, reduce efficiency, and cause the dryer to overheat, potentially damaging both your hair and the appliance.